How To Upgrade the Electronics in the ARRMA Kraton
 Hi, my name is Iron Mike and I like long walks on the beach and destroying rc cars. You might know me as a part of the BSRC Bash Crew or perhaps from the Prop Wash boat column that I’ve been slacking on (for months now). A few weeks ago Cubby comes over to my house and drops a brand spank’n new ARRMA Kraton in my lap. Holy smokes, it was my lucky day! The Kraton is easily one of the biggest, baddest bash trucks on the market. Then I realized that if he was dropping it in my lap, it was only because there was work to do. Luckily for me I was told my only job was hop it up, using any type of gear I wanted to. A few minutes later I had Cubby’s company credit card in hand and was on the phone with Tower Hobbies ordering up some seriously kick ass electronics.
Please click on the “Read More” button to find out exactly what I installed, along with step-by-step instructions on how to switch out the electronics in your Kraton.
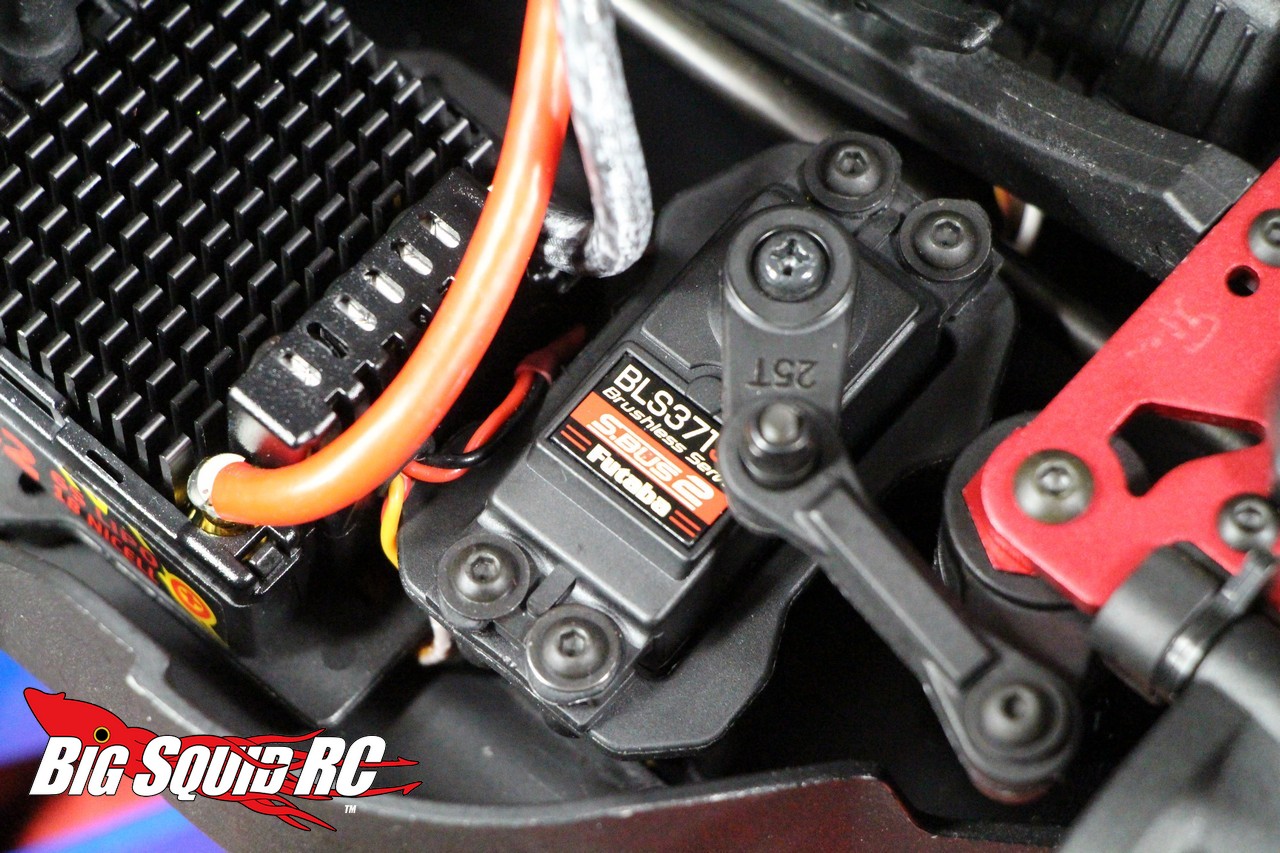
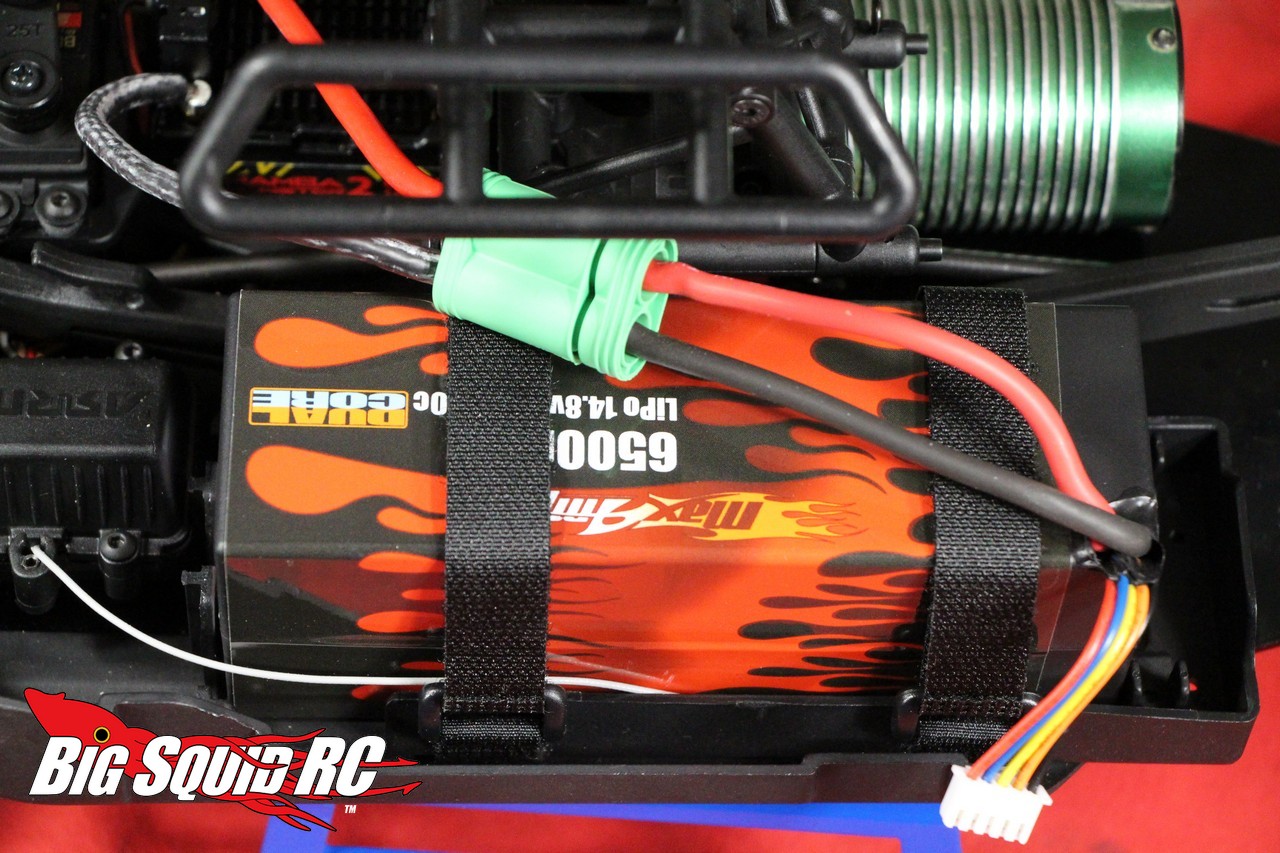
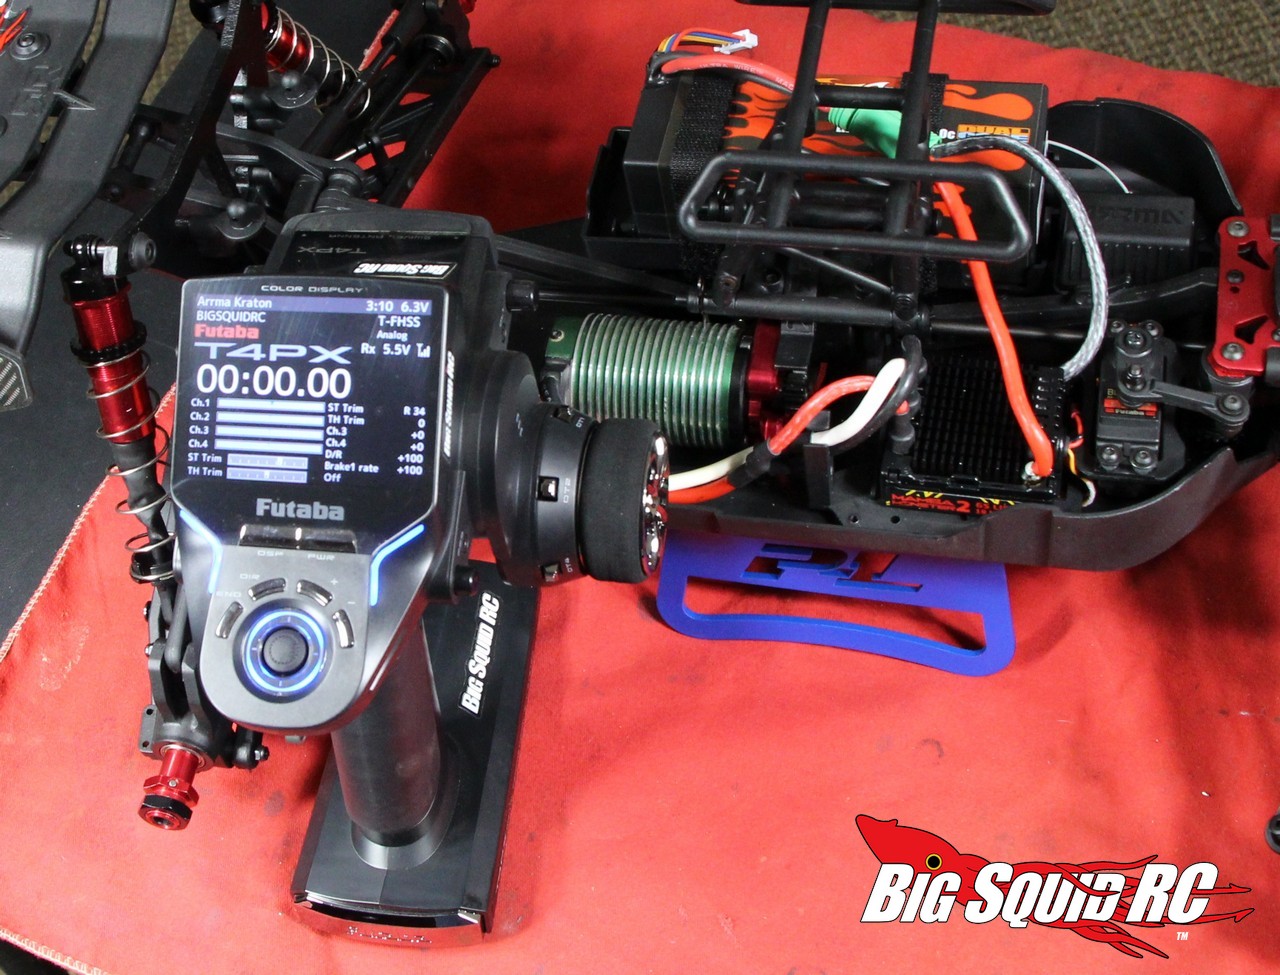
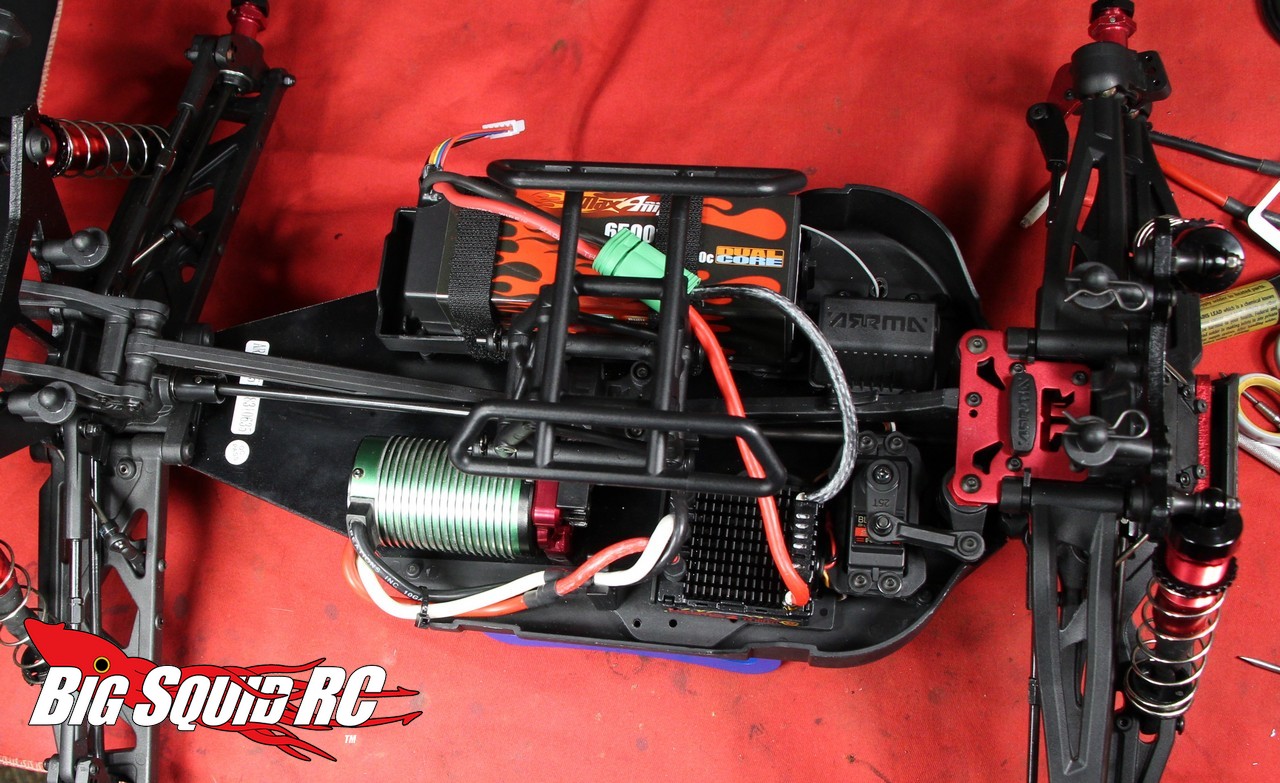
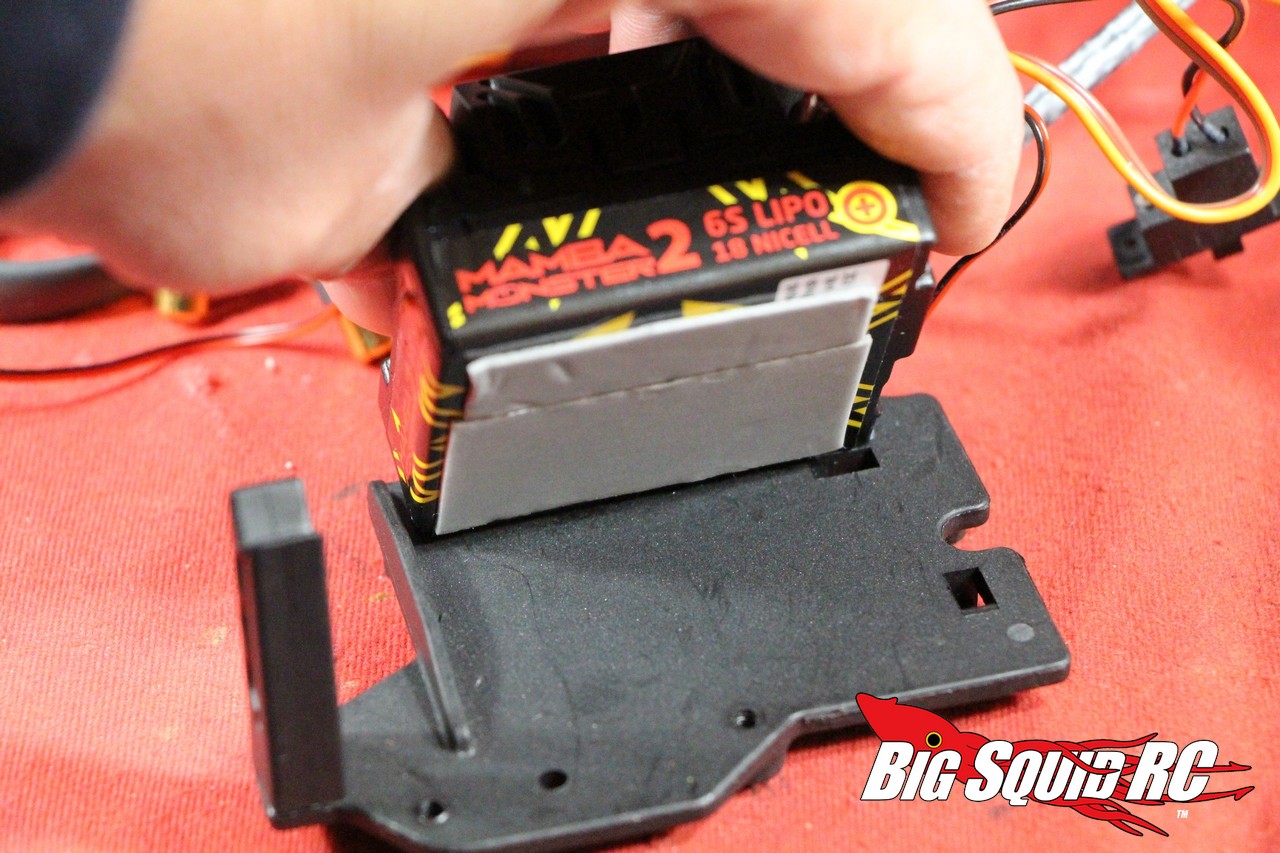
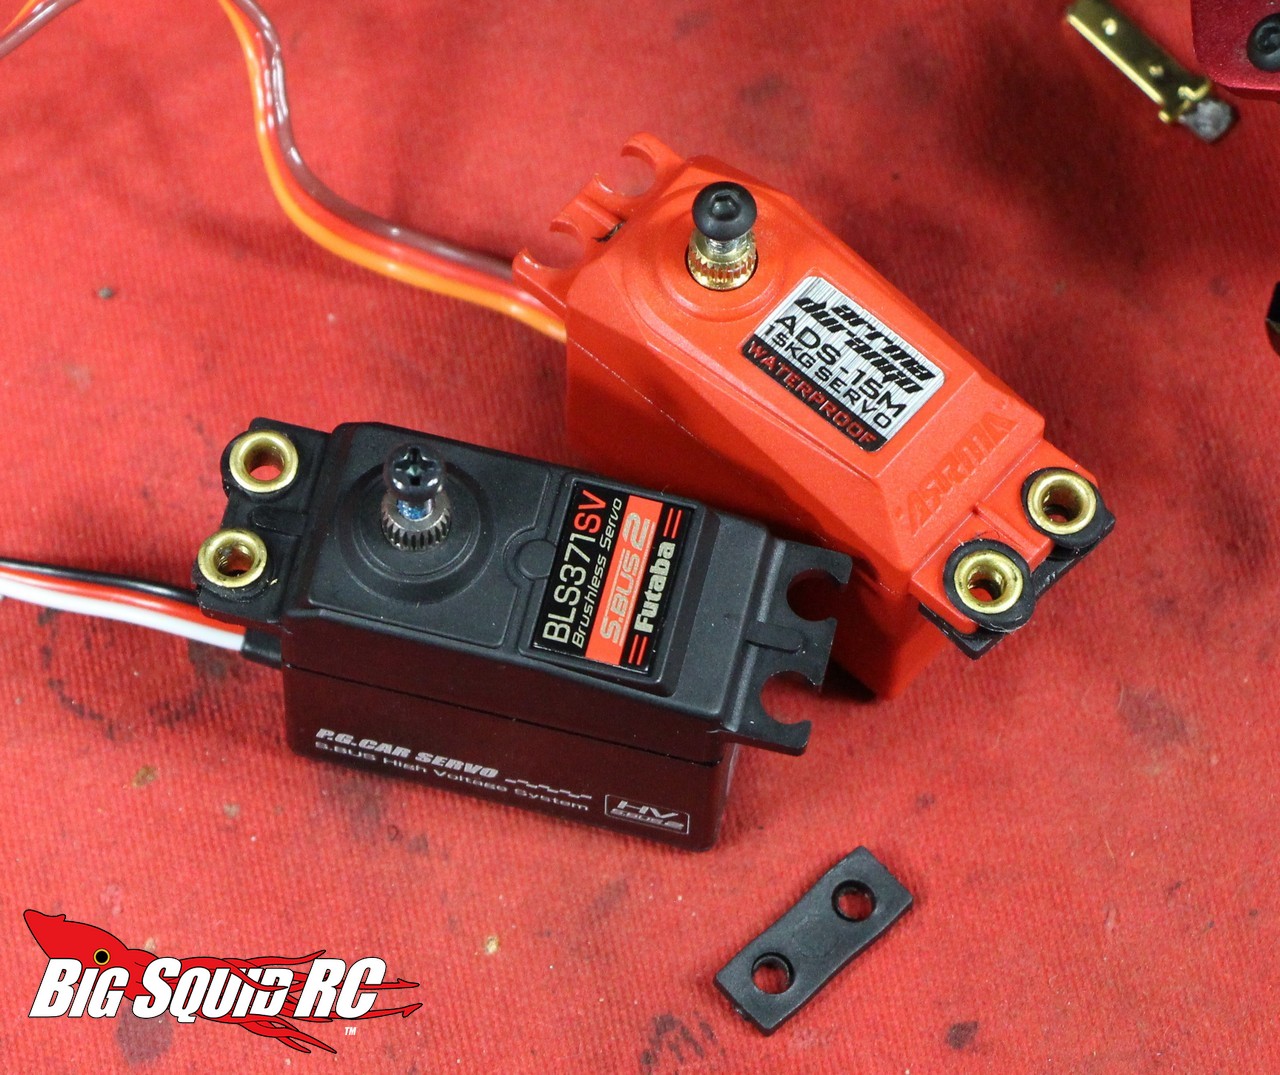
I wanted to upgrade the Kraton with the best possible electronics that money could buy. For radio gear I went with the Futaba 4PX. It has an insane amount of features, drives awesome, and generally looks very trick. The stock servo in the Kraton is actually quite good, but it wasn’t the best money could buy so I ordered a Futaba BLS371SV. The 371 has plenty of torque, good speed, but I consider it to be one of the smoothest servos on the market with its brushless motor. For power there was really only one choice, Castle Creations. The stock motor is only 2050kV, so going with a Castle Mamba Monster 2 system with a 2650kV motor would instantly mean a lot more power on a 4S LiPO. Speaking of the battery, I wanted to go with a single 4S pack instead of the stock set-up of wiring a pair of 2S packs in series, so I went with a 150C MaxAmps 6500mAh. The MaxAmps 4S 6500 is known for serious power with extra long runtimes, exactly what I was looking for on this project.
Needless to say, changing out all the electronics made the Kraton into an entirely new kind of beast. It had more power across the board, with an impressive boost in top speed. The steering was smoother and more precise, while using the 4PX not only felt better in hand, but made driving the Kraton feel much more natural. All in all, the Kraton is certainly worthy of such high-end upgrades, they take it to an entirely new level that few, if any, bash trucks on the market can match.
If you know how to wrench, good for you, but if you are new to the hobby I’ve listed below a step-by-step guide on how to switch out the electronics. Enjoy, and look for more Kraton hop-up articles in the future.
Pulling Out The Stock Gear
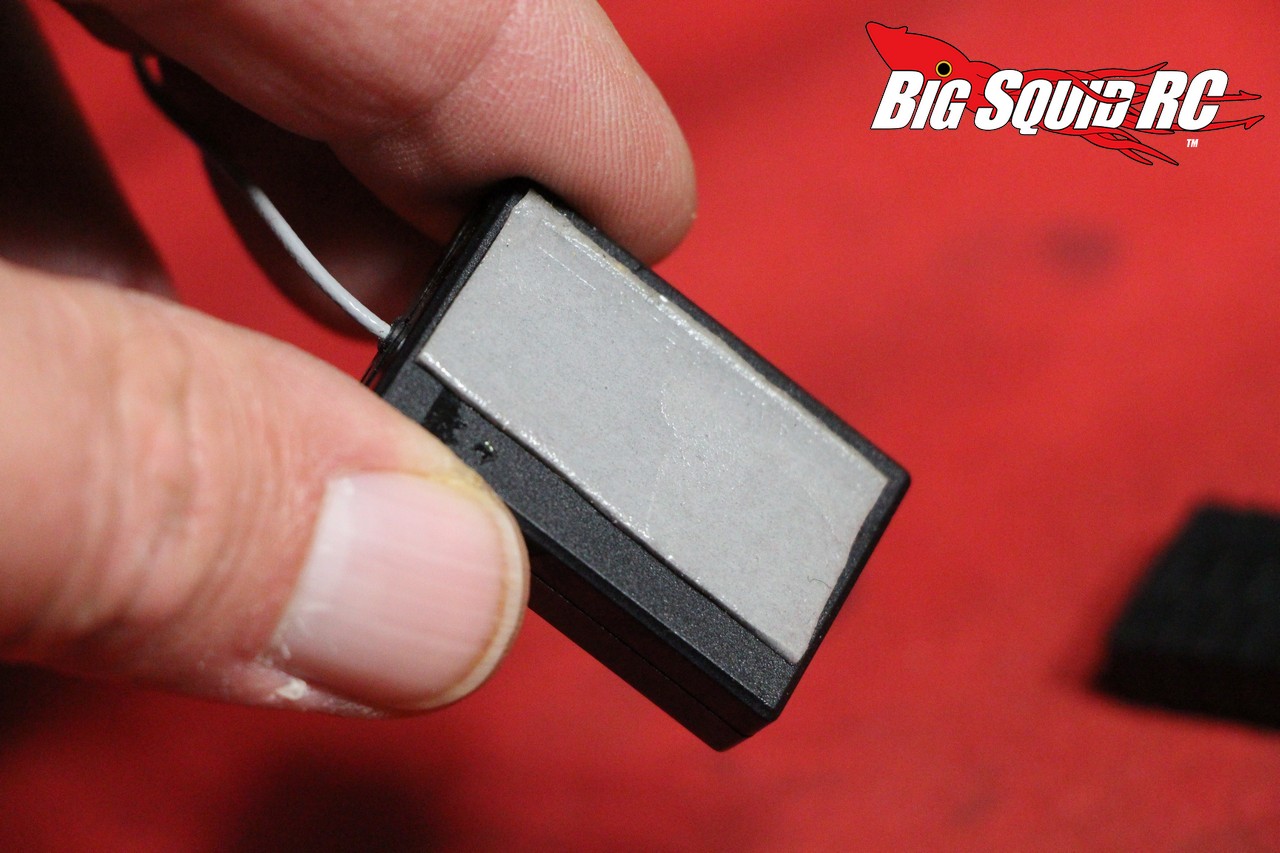
* Start by removing the receiver. Grab a 2.0mm hex driver and remove the four screws holding down the receiver box lid. Unplug the signal wires from the servo and ESC, then the receiver is free from the truck.
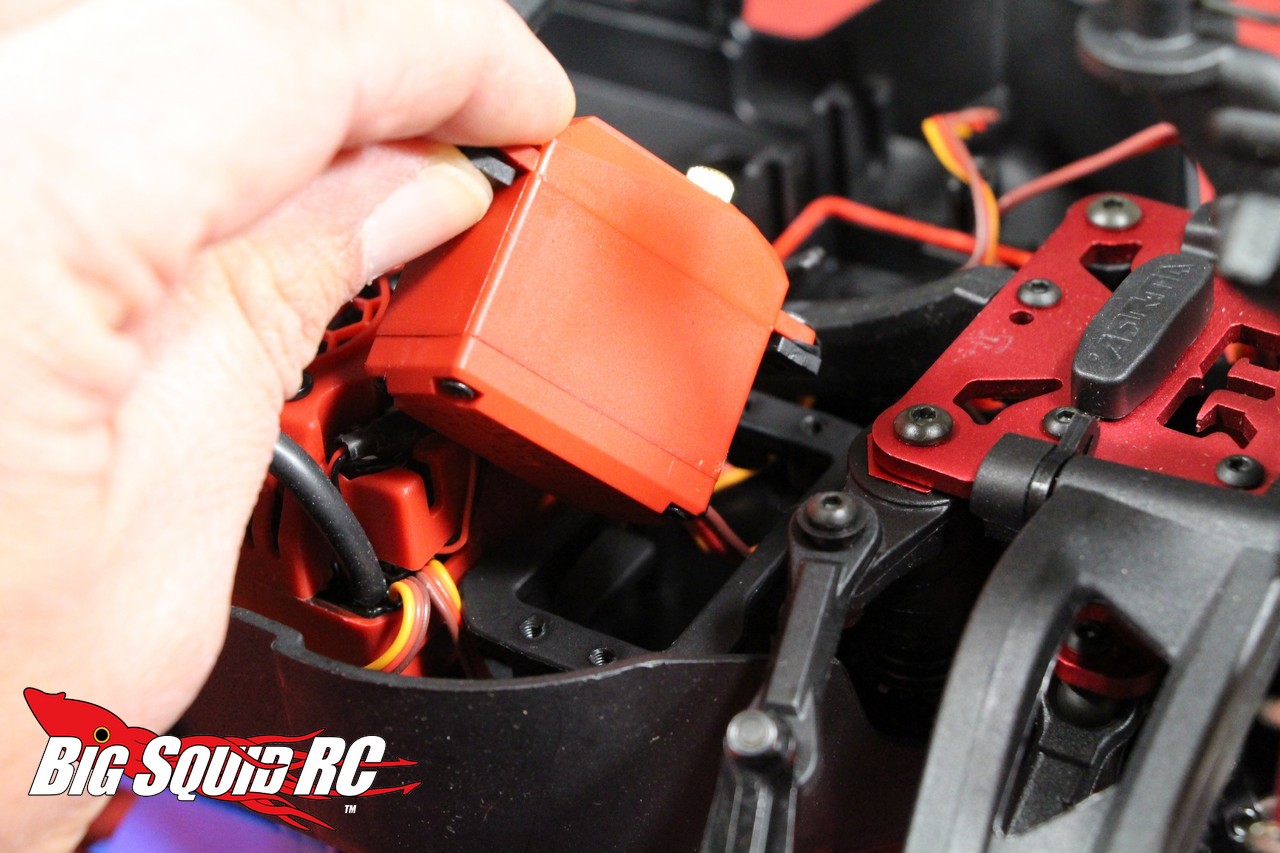
* Now it’s time to remove the servo. Grab your 2.0 and remove the four screws that hold the servo down, plus one more screw that holds on the servo arm. The servo is now free so yank it out.
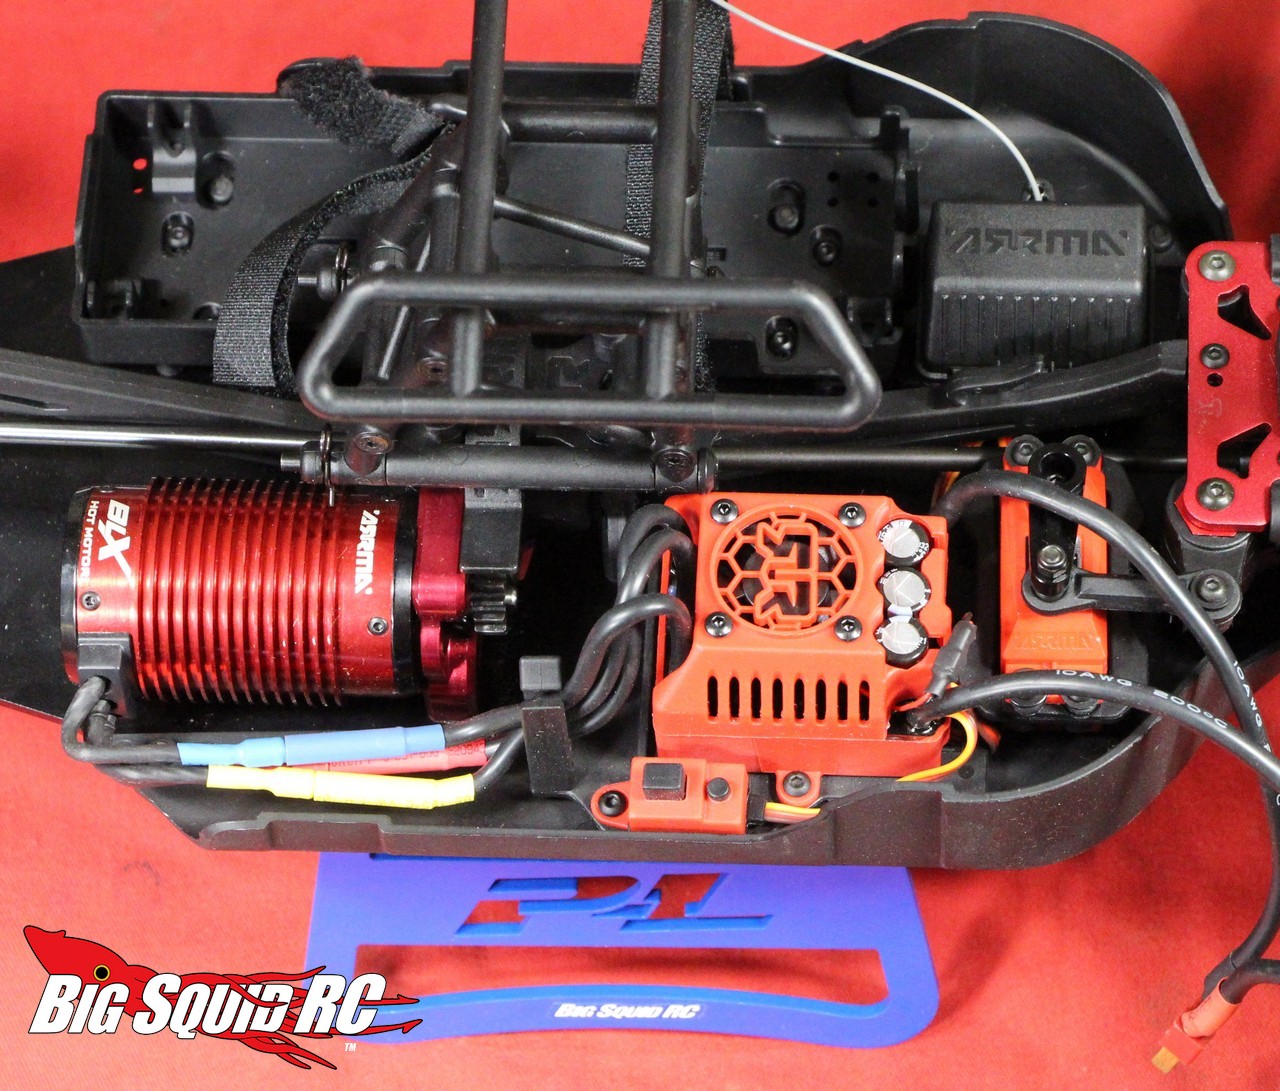
* Next up is the removal of the ESC. You’ll need your 2.0 again to remove two screws from the ESC, plus one more that holds down the switch. At this point the ESC is still held in by its signal wire that runs to the receiver. To get this loose you’ll need to flip the truck on its lid and remove four 2.0 screws that hold in the ESC plate. Once these are taken care of you can get the signal wire loose from the plate. Unplug the three wires that run to the motor and the ESC is now free from the truck.
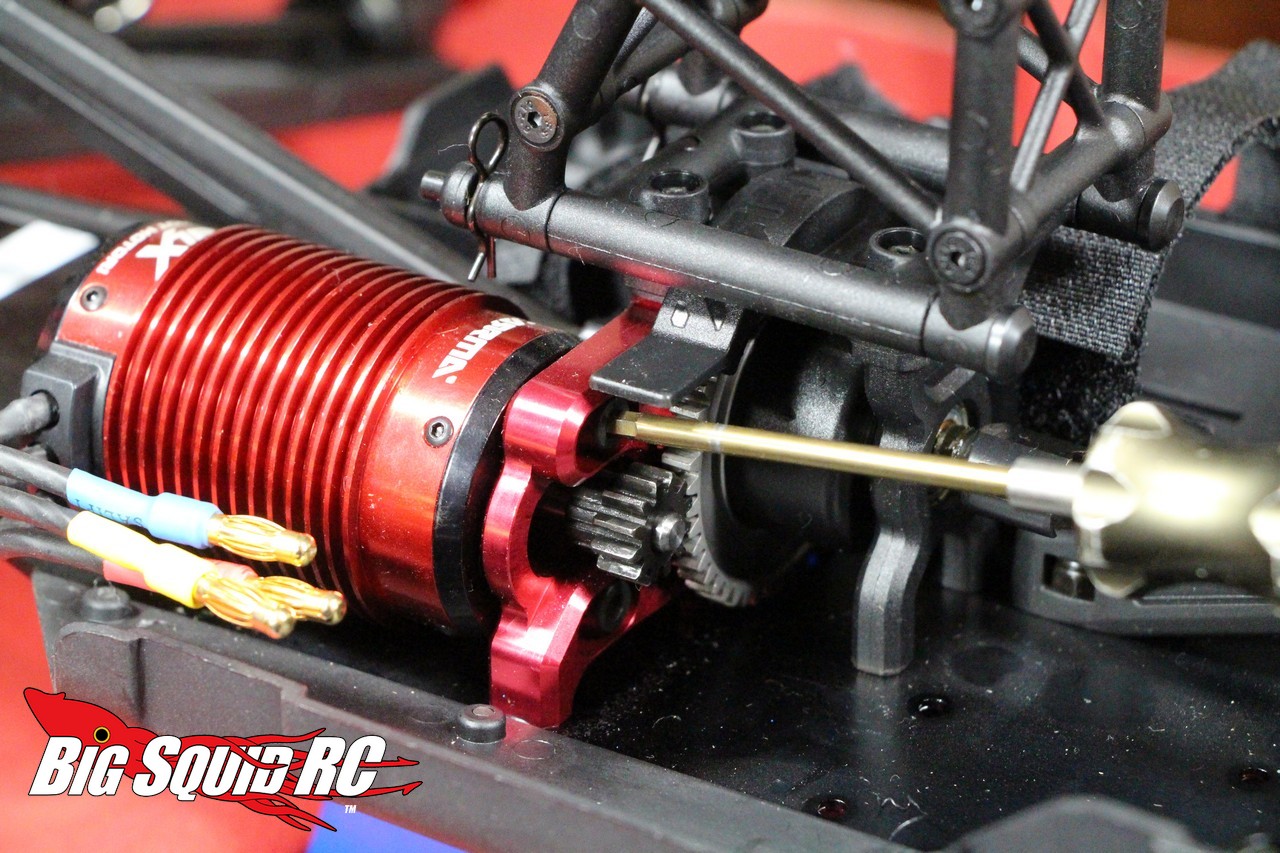
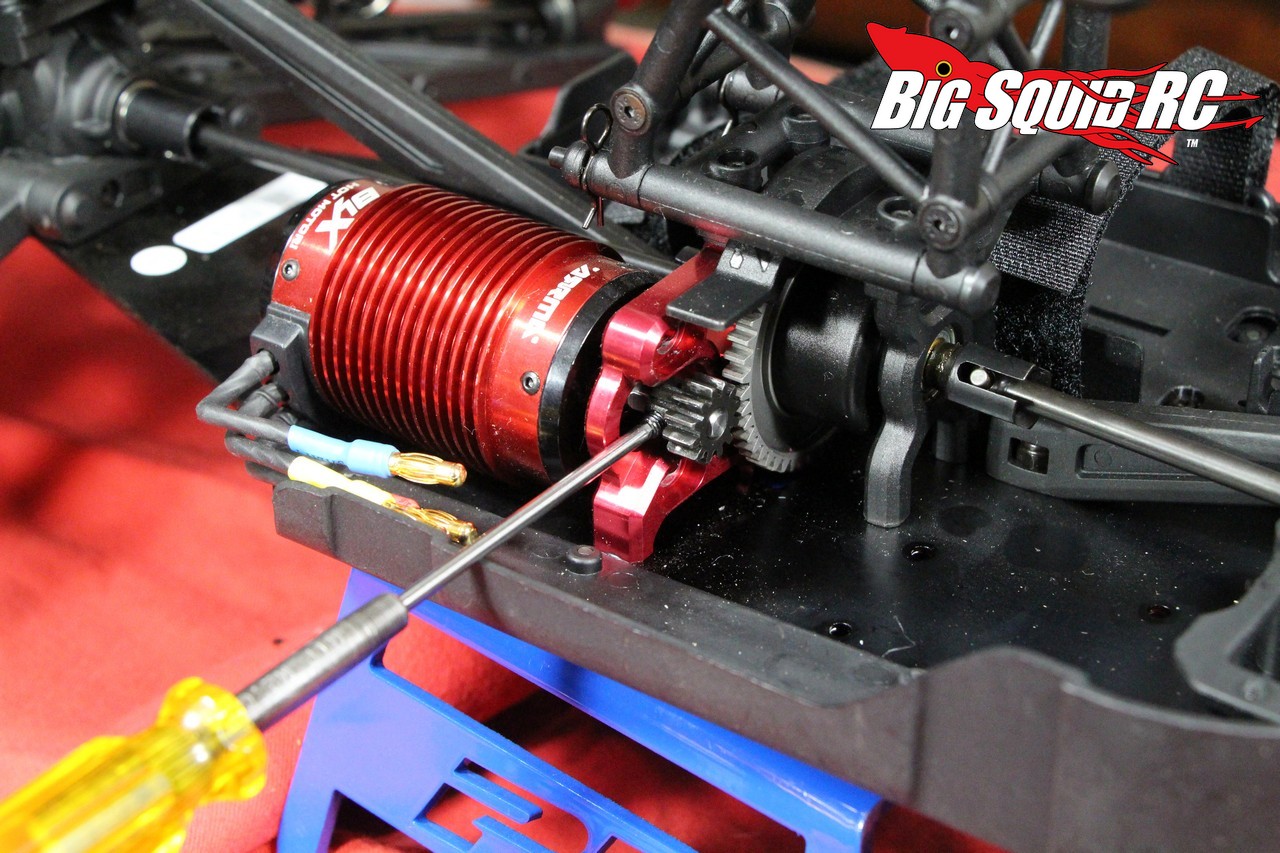
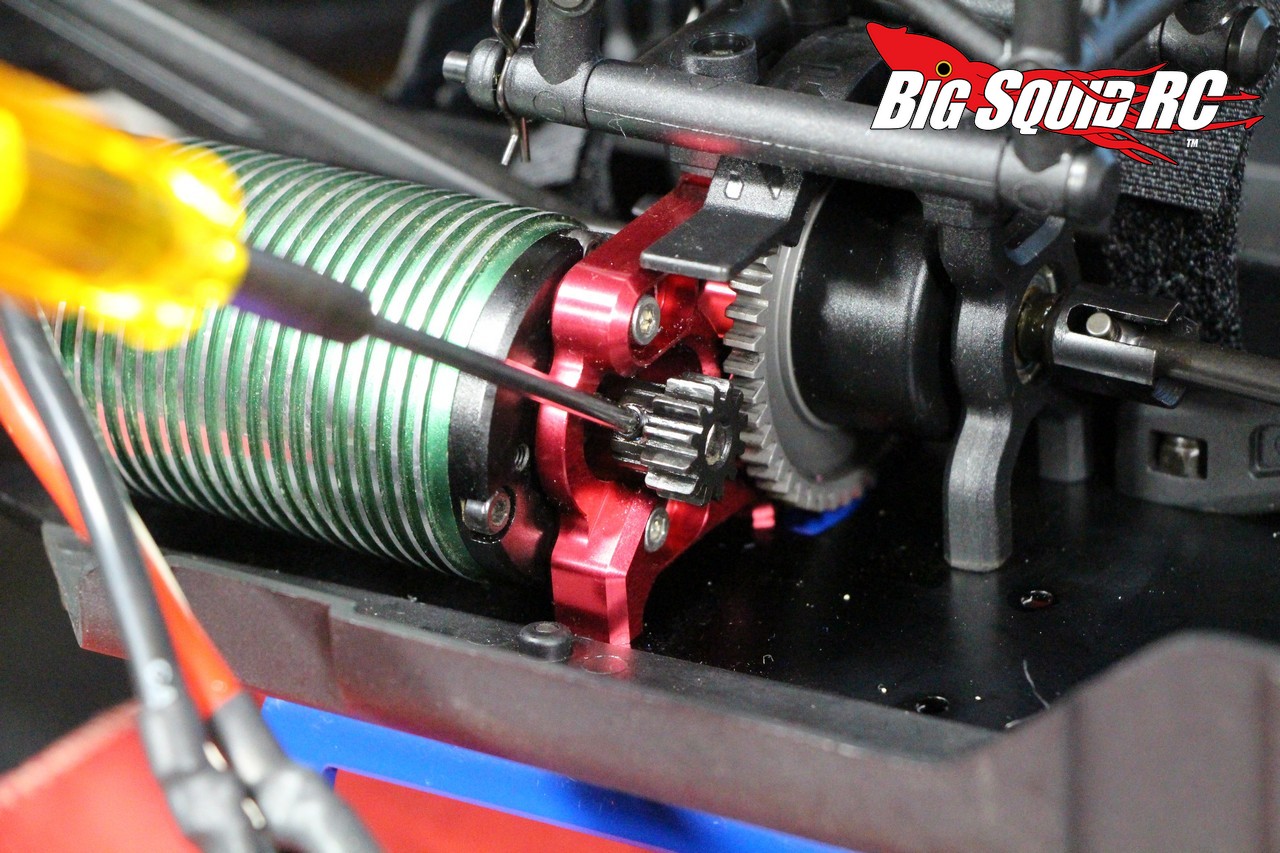
* The first step in removing the motor is to take off the pinion. This is done by loosening the 2.0 grub screw on the pinion. The next step is to remove the pair of 3mm screws that hold in the motor. An “L-wrench” comes in handy here, and once done you’ll have the motor in your hand.

Time To Install The Good Stuff!!!
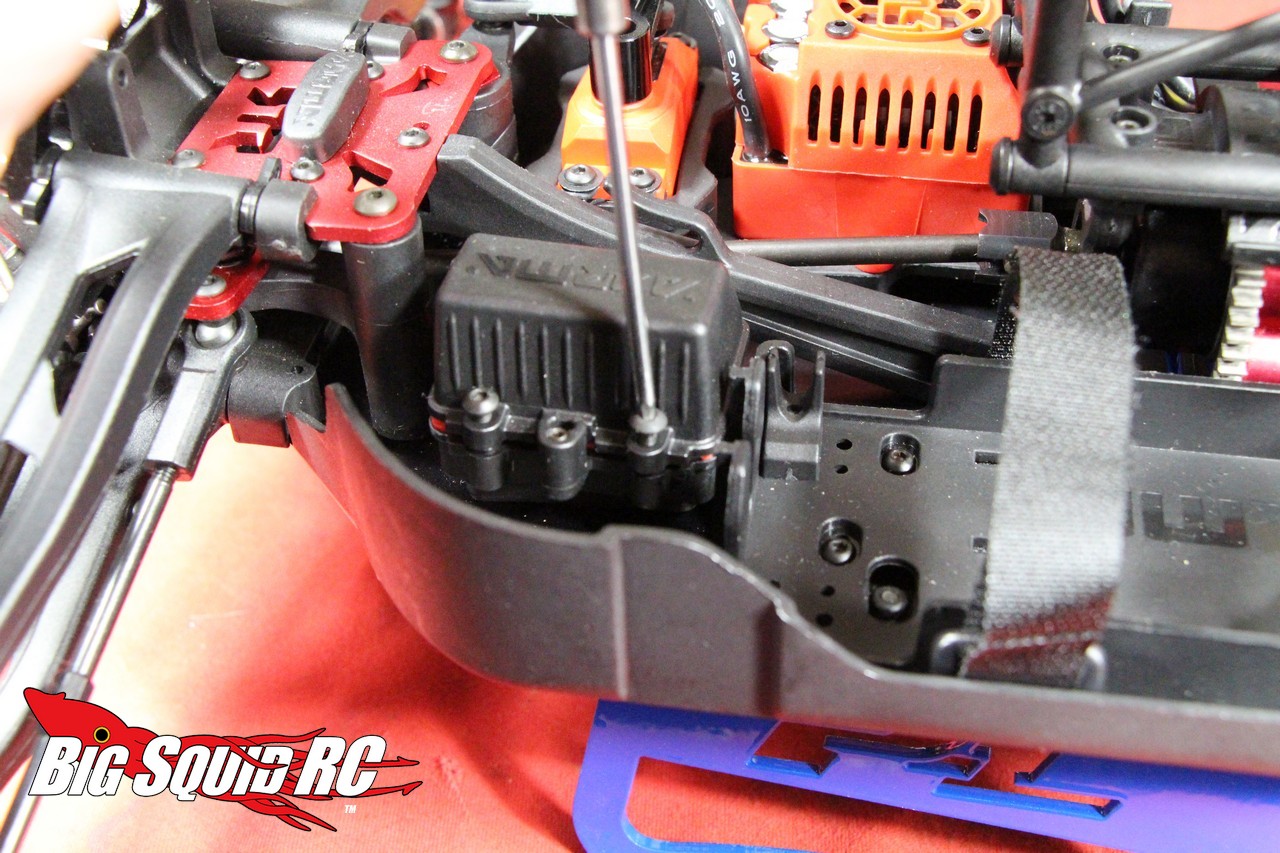
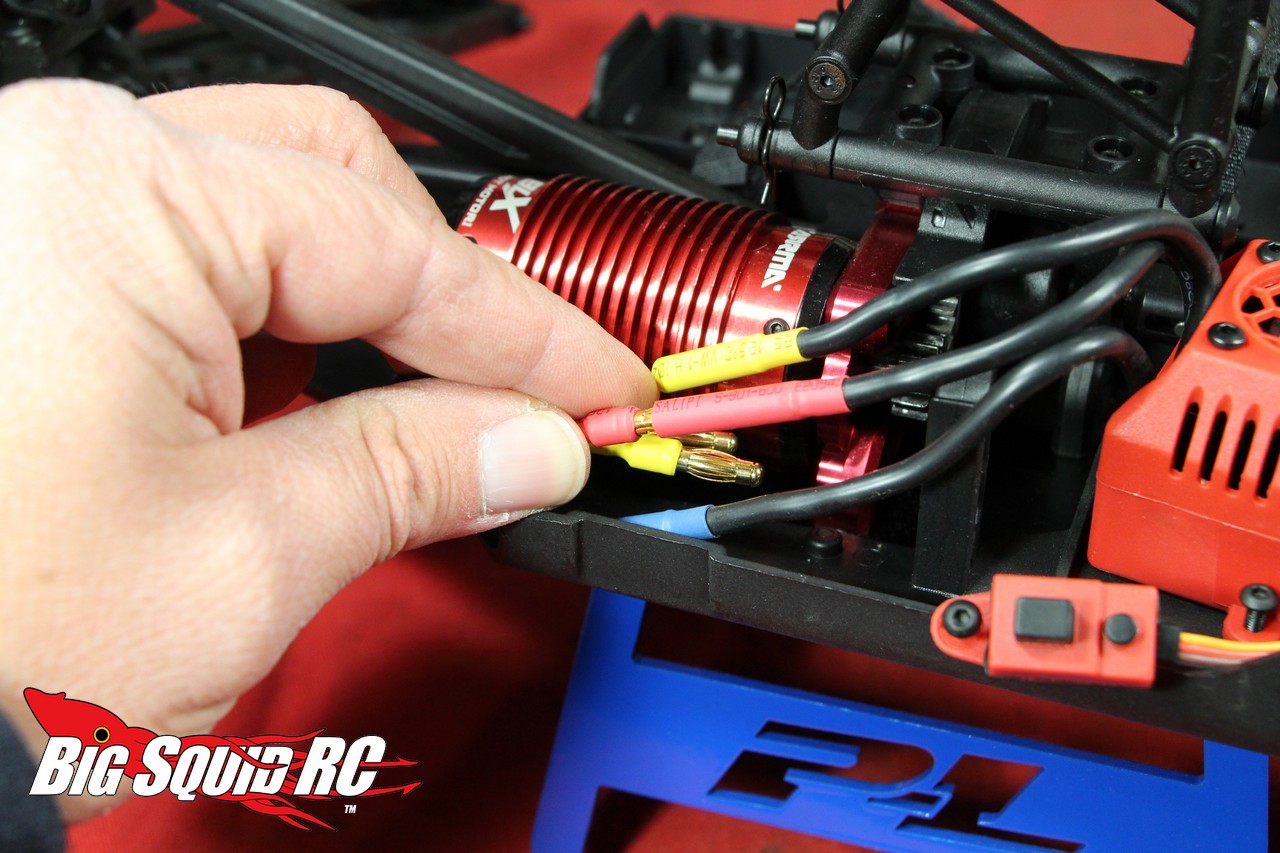
* First up is the new motor. The stock 3.0mm screws don’t work with the Castle motor, so you’ll need to use the screws that are included with the new motor. Put the screws in the motor but don’t tighten them completely yet, just snug them. Now grab your pinion and install it by tightening the 2.0mm grub screw. The next step is very important, setting the gear mesh between the pinion on the motor and the spur gear on the truck. There are numerous articles on the web how to do this, some do it with a piece of paper, but personally I just eyeball it. You don’t want the gears too tight as this will cause binding, and you don’t want them too loose as it will cause a stripped gear. Once you have the gear mesh set you can crank down on the motor screws. I recommend you make them very tight so the motor doesn’t slide during heavy bashing.
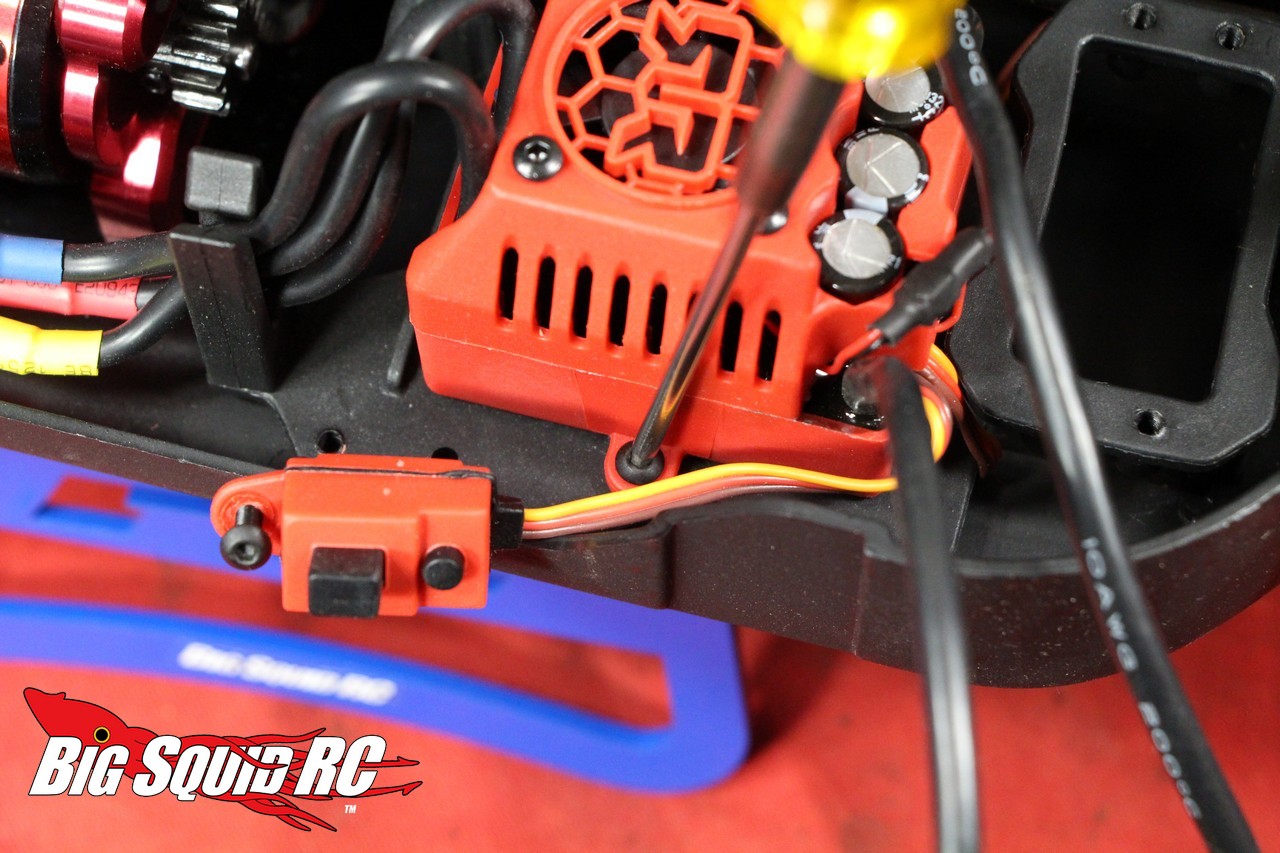
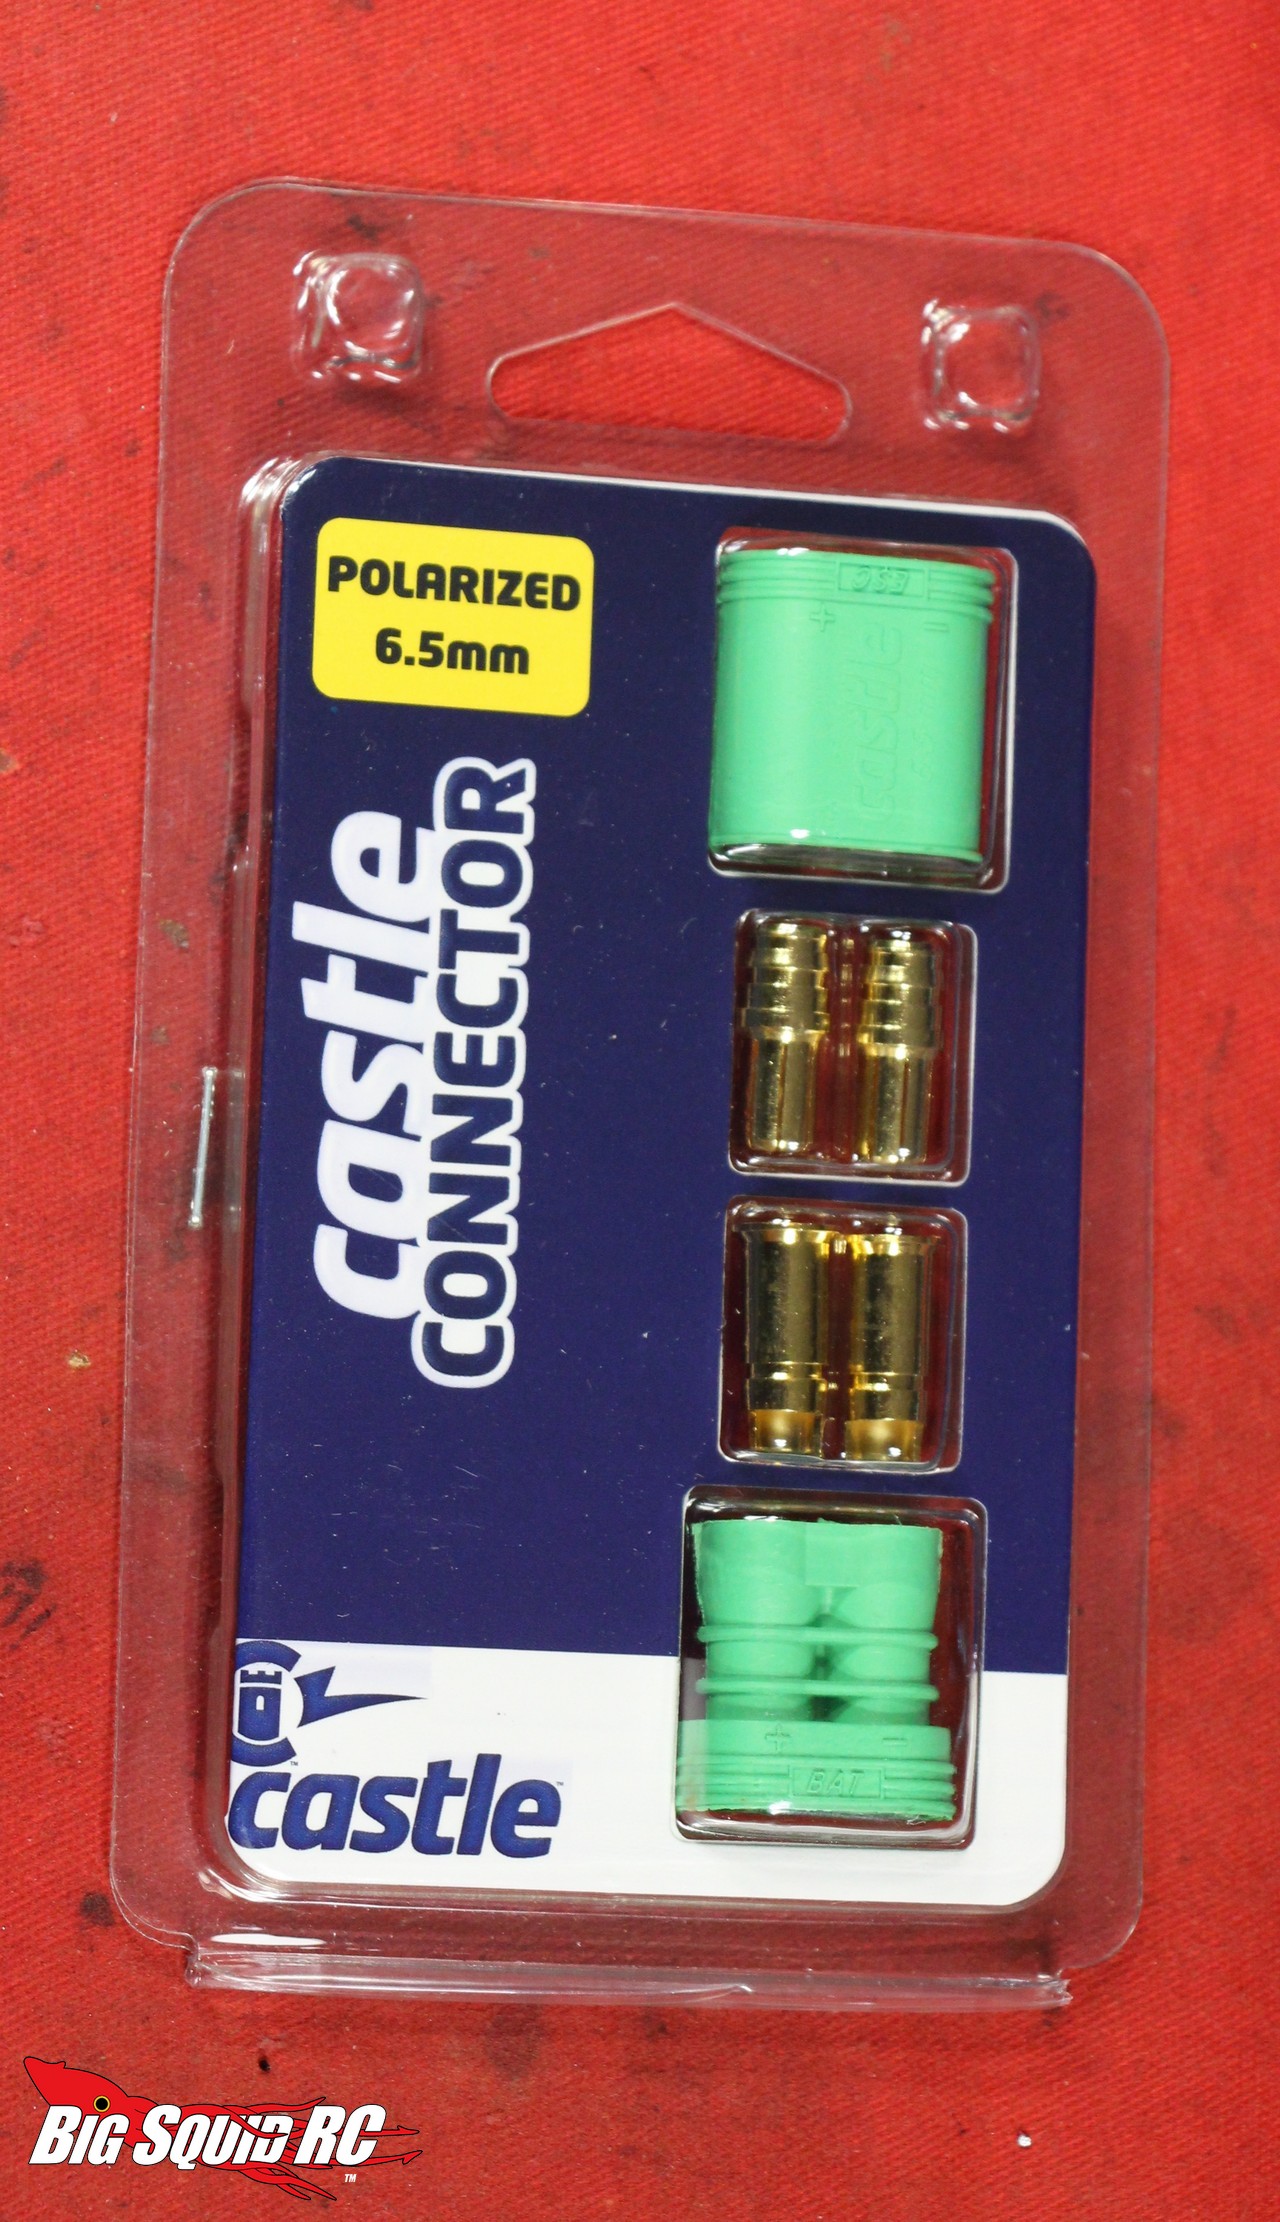
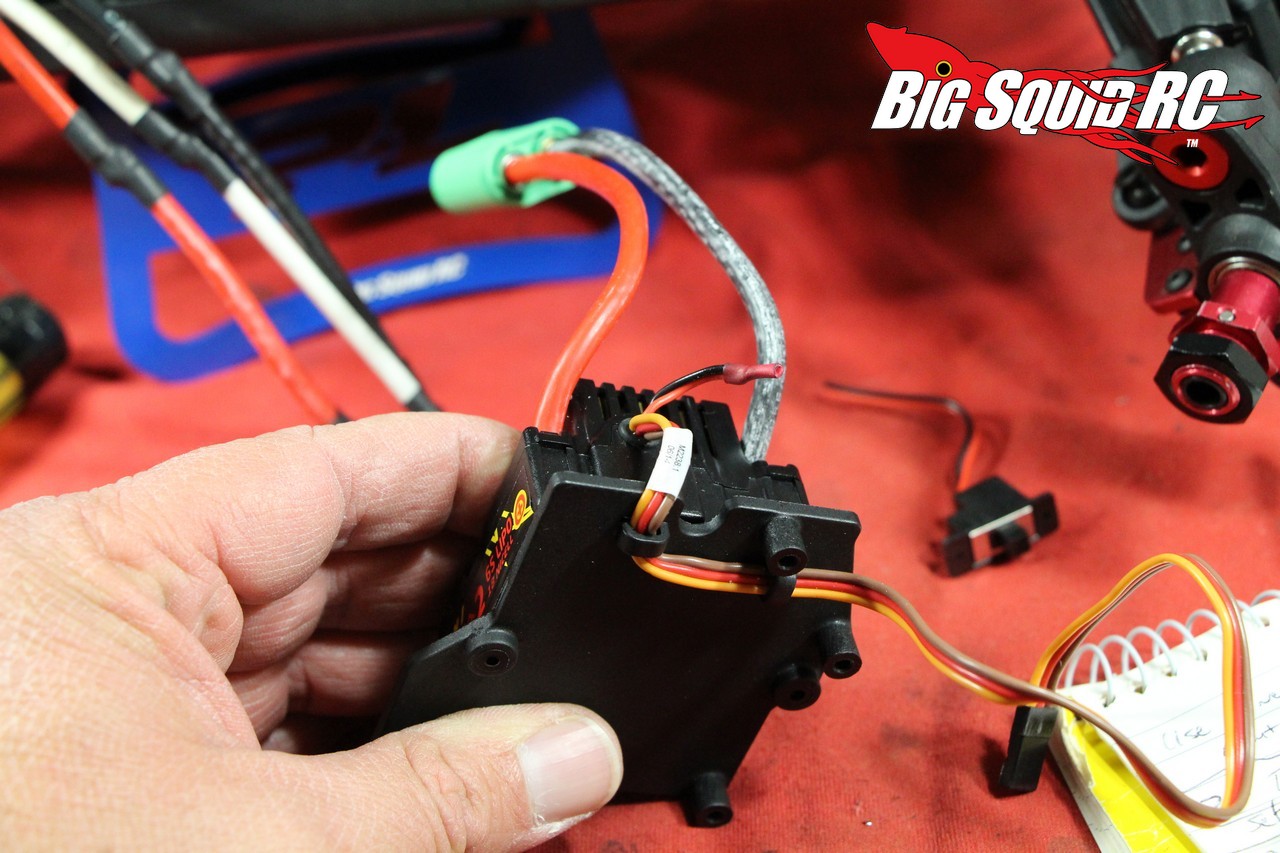
* Now it’s time to mount the new ESC. First we are going to prep the ESC, in the case of the Castle this means removing the fan, removing the on/off switch, and soldering on a connector. We removed the fan on our Mamba Monster 2 because we will be running our Kraton in a lot of wet conditions. You see the Mamba ESC is waterproof, but the fan is not, so it had to go. We also removed the on/off switch. This is done because they tend to “go bad” at the absolute worst time, and they aren’t really needed for anything other than convenience. To remove the switch simply cut it off then solder the red and black wires together. This will make the ESC be “on” anytime you have a battery plugged in. Next up is to solder on a connector. The choice of connector is up to you but in super high current applications such as this one (an 8th scale monster truck), we’ve found that the huge 6.5mm Castle connectors can’t be beat so that is what we used.

* The ESC is now prepped, time to mount it up. We used double sided sticky tape to secure the ESC to the ESC plate, then routed the signal wire under the plate. Re-install the four ESC mounting plate screws through the chassis and run the signal wire into the receiver box. Plug in the three motor wires, use a couple of zip ties to tidy things up, and the ESC install is finished.
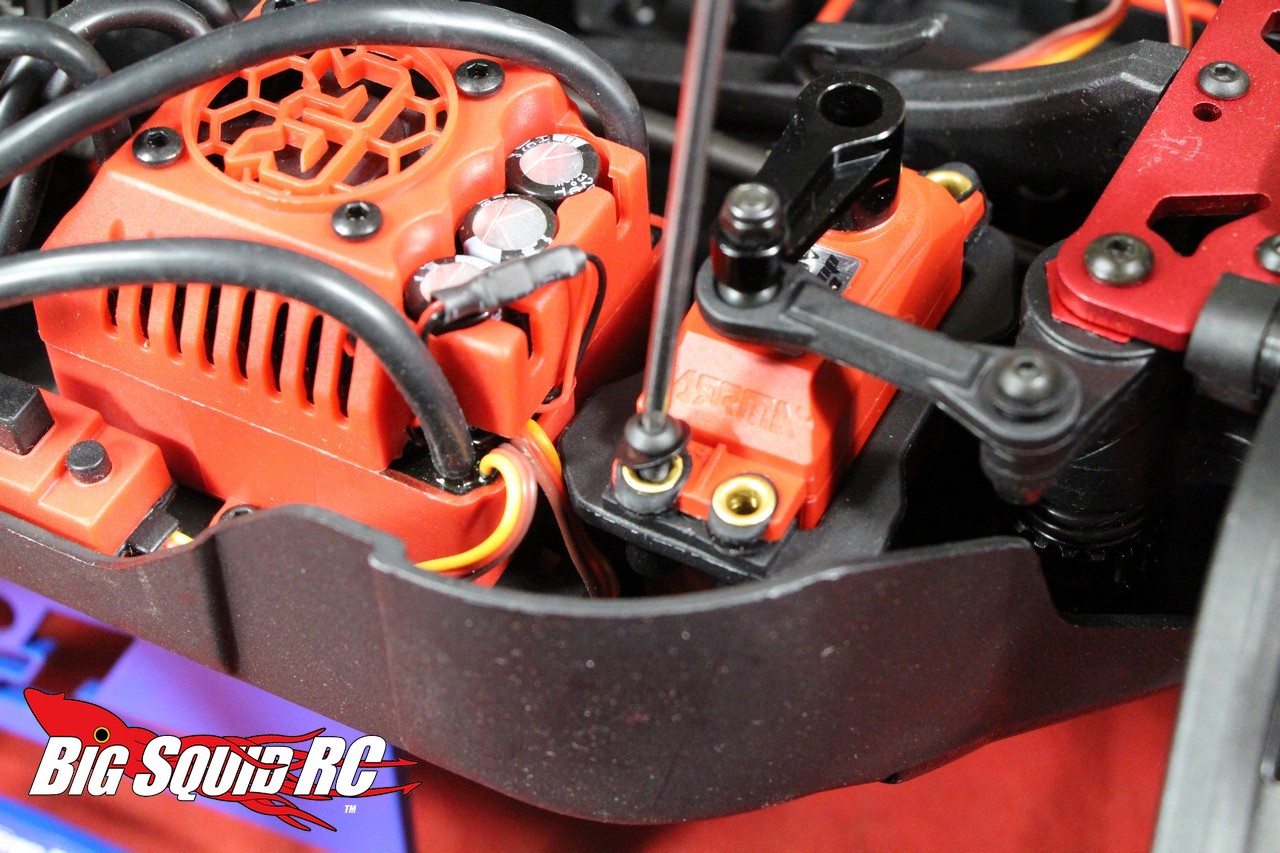
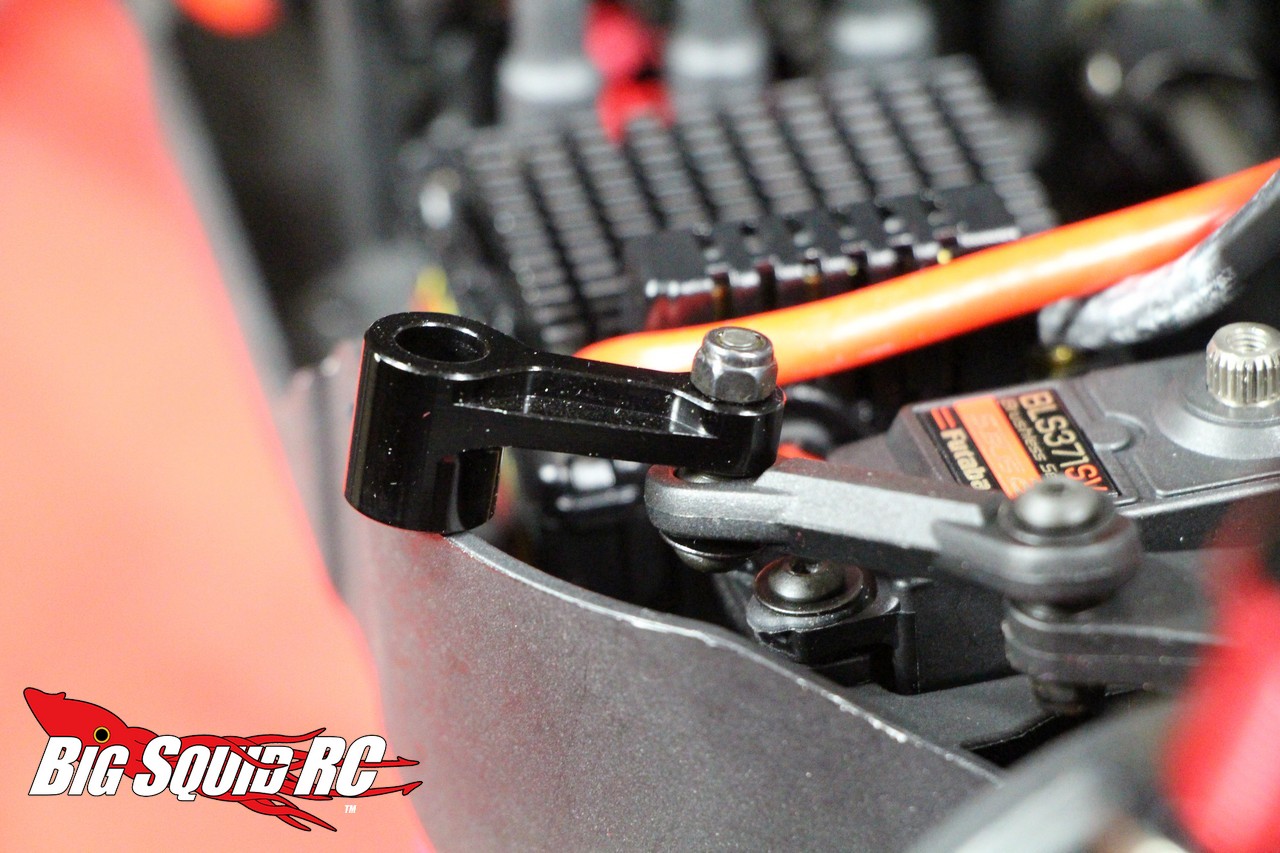
* Now it’s time for the new servo. Remove the rubber mounts off the stock servo and put them on your aftermarket unit. Route the signal wire over to the receiver box and slide the servo into its position. Put in the four 2.0 screws to hold it down, but do not put on the servo horn yet.
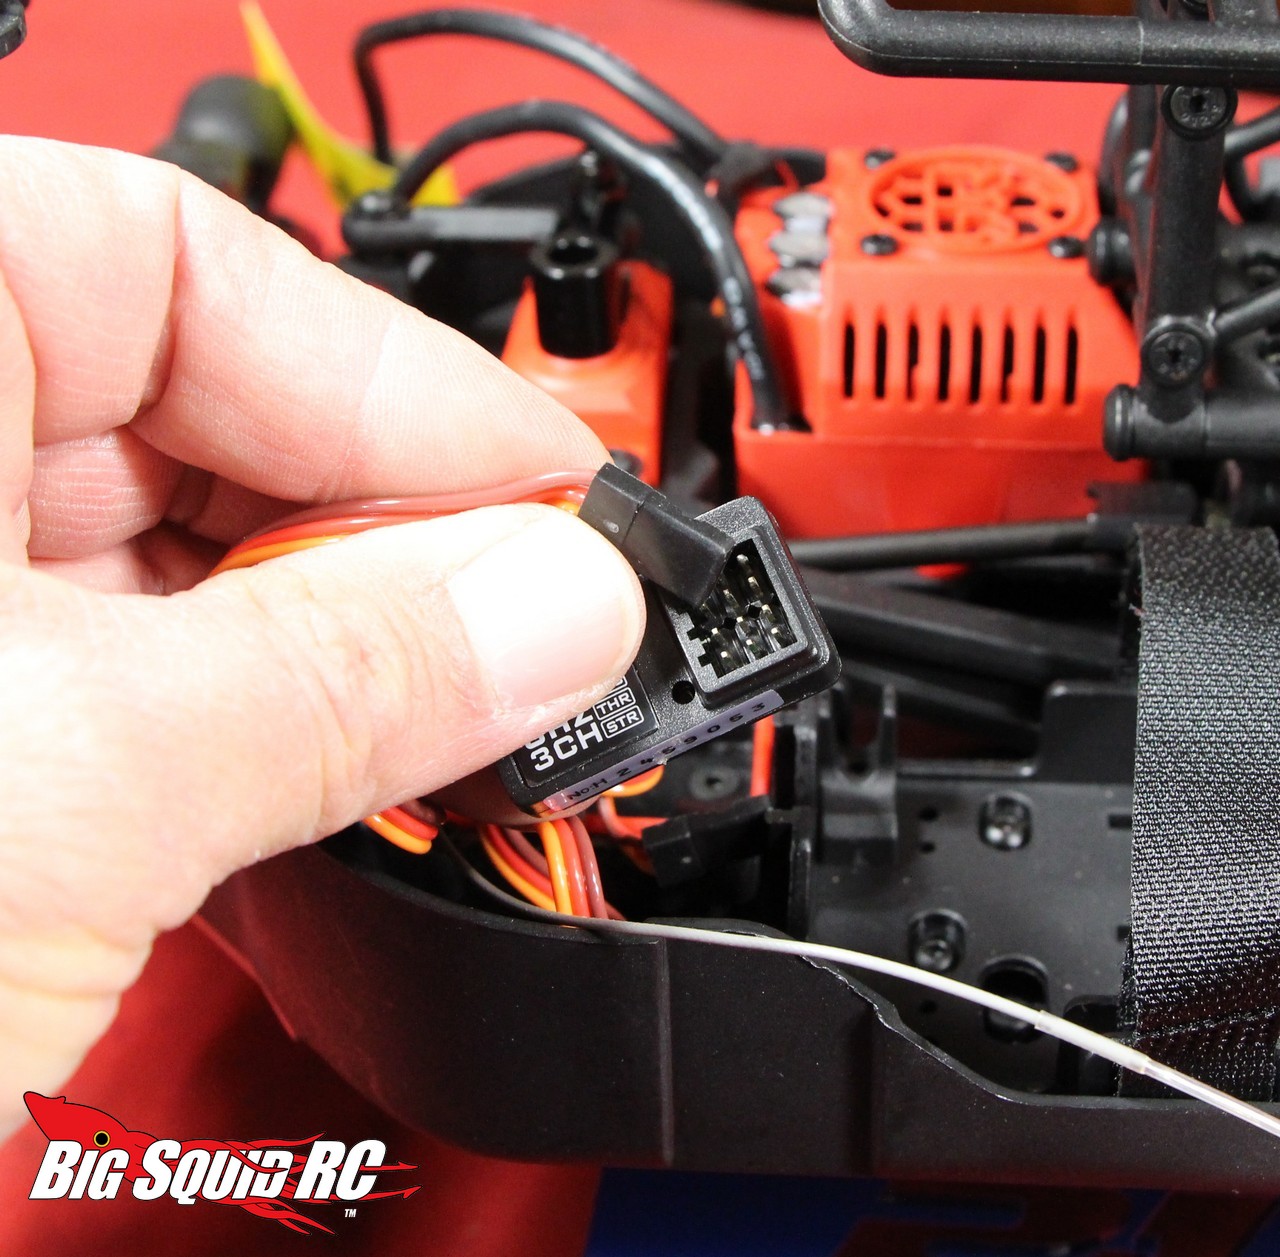
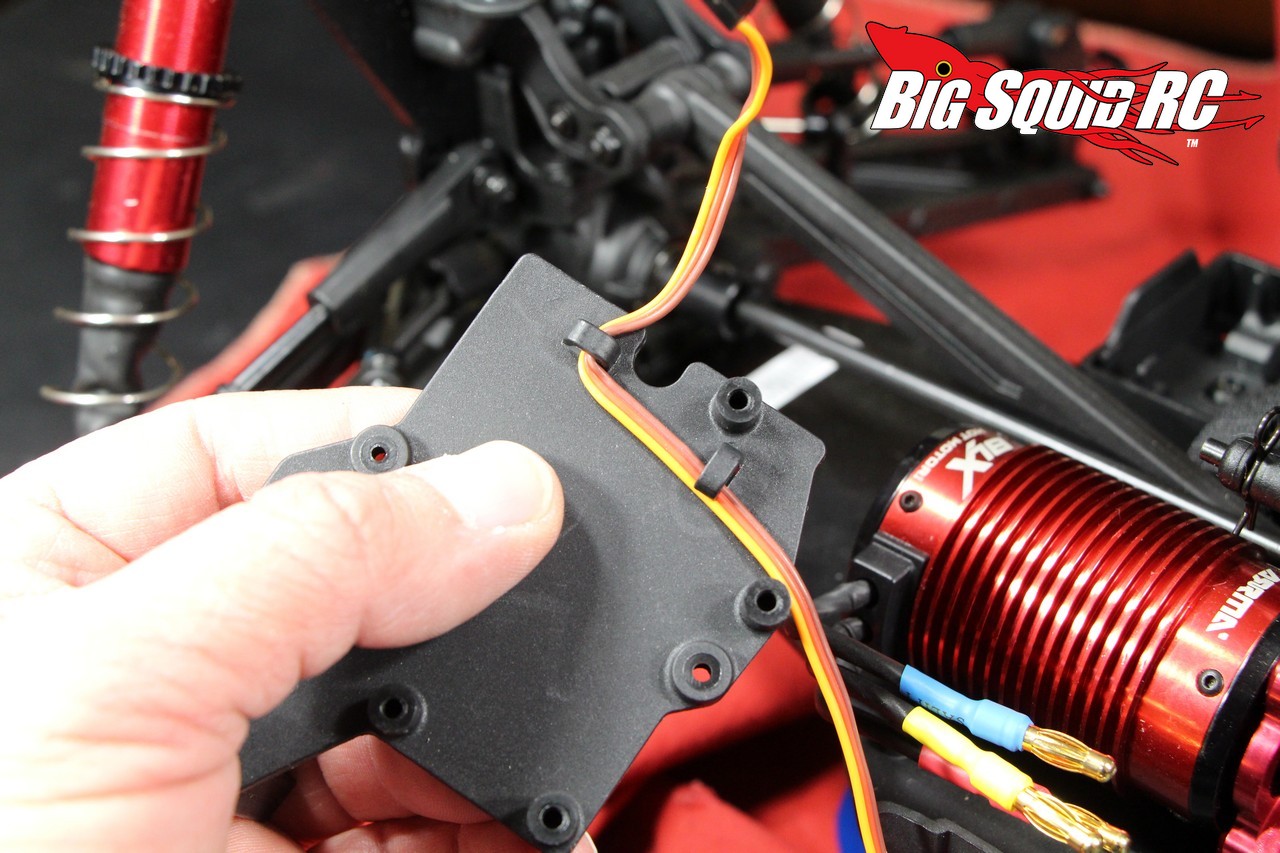
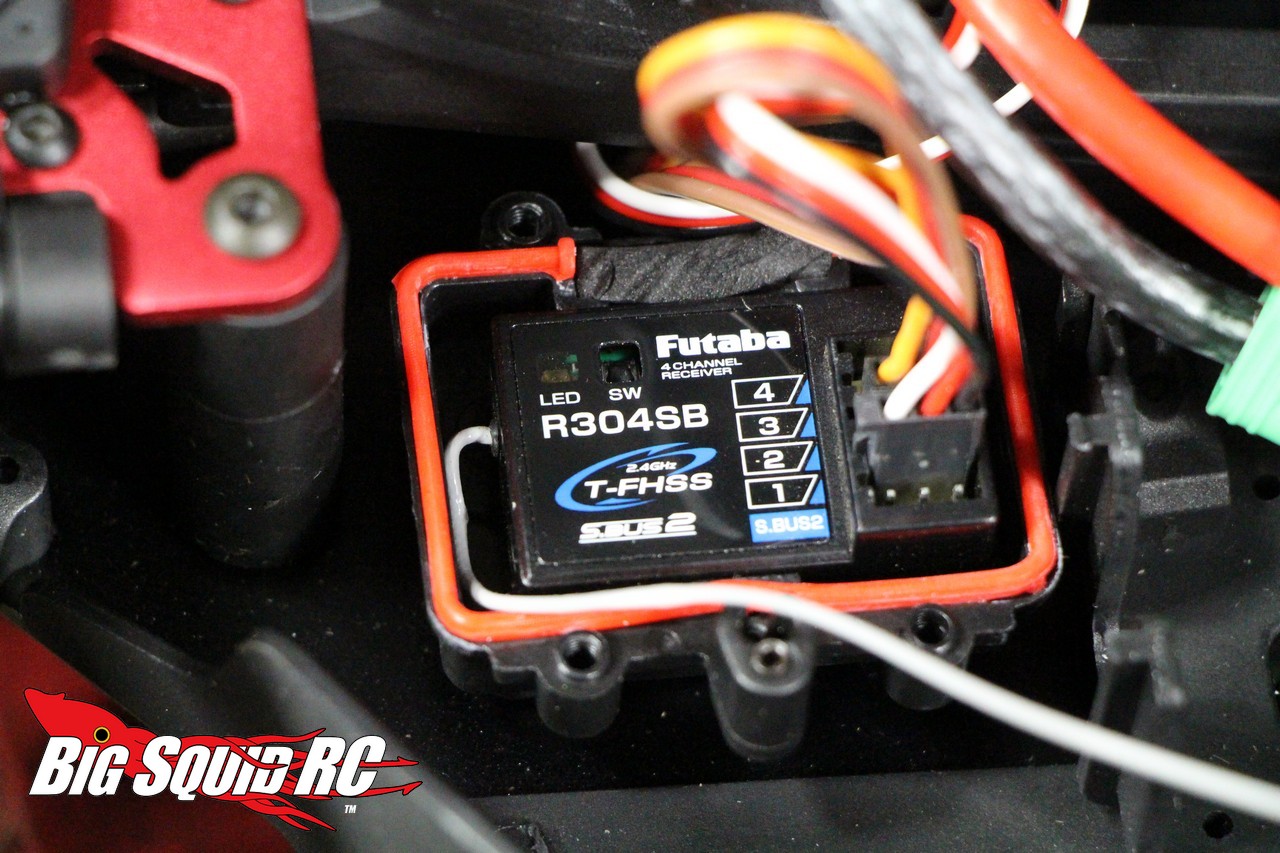
* Next up is receiver time. We used double sided tape to secure the Futaba receiver in the receiver box. Please note that the side of the receiver that you plug wires into needs to go towards the outside of the chassis. The top of the receiver box is beveled, with its highest point being the outside edge. Now plug in the signal wires from the ESC and servo. Pay attention when plugging these in (you don’t want to plug them in backwards), their black (or brown) ground wires need to go towards the outside of the receiver, not towards the inside. If your receiver has already been bound to your transmitter you can now install the receiver box lid with four 2.0mm screws.
* Whoa, it might look done at this point but it isn’t (not quite). Grab your new transmitter and calibrate the new ESC. This varies with brand (and may require reversing of the throttle channel) but basically requires that you plug in the battery, turn on the ESC, then show the new ESC where neutral, full brake, and full throttle are.
* Once the ESC has been calibrated, it is time to mount the servo arm. The stock servo arm might fit on your new servo, if not you can use one of the servo arms that came with your new servo, or buy one that fits properly from your LHS. Turn on your transmitter and make sure its steering trim is set to zero, then turn on the ESC. Mount the servo arm on the servo making sure the front wheels are centered. Turn off the ESC then tighten down the servo arm screw. Turn the ESC back on and see if you need to reverse the steering channel, then set the endpoints to make sure the servo isn’t needlessly straining at full lock left and right.
* Ok, you might be done, but maybe not. Because we were using an aftermarket 4S MaxAmps pack, the stock battery tray needed to be re-arranged. We had to remove one 2.0mm screw and slide back one of the battery spacers for our pack to fit properly.
Finally, all done! I know it sounds like a lot of work to change out the electronics but a couple of hours of wrenching allow you to get to know your new truck much better, plus it will help you absolutely smoke your bashing buddies on the weekend!