Losing grip – Checkered shirt? Check! Painting an interior
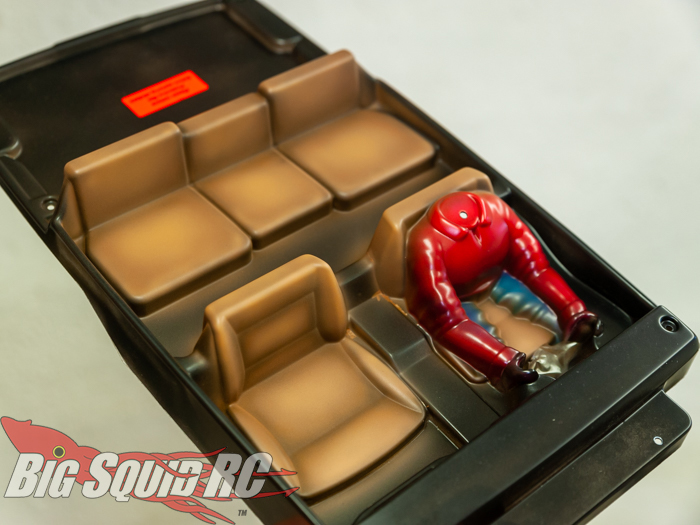
A really good thing with the SCX10III is that it comes with an interior, complete with a driver. It certainly adds a lot to the look. Especially so if the interior is nicely painted. True, it is seldom seen up close, but still I like to spend some time on it. I mean, why not? It’s a hobby after all, not a competition to the finish line. I’ve done it once before, now I’m at it again. Using an airbrush it’s actually fairly easy to give it a look that pops. If you don’t, yet, own an airbrush, consider this as inspiration.
One of my goals with this interior was to not spend too much time on it. A bit contrary to what I just wrote, I know, but I know how lost I can get on details and wanted to keep things reasonably simple this time. Where then to put limits? Easy, by removing something I’m not fond of: masking. An airbrush can be used with considerable precision, and when coupled with the overspray film that should give me quite a lot of leeway.
First, a note on the basics. I thin my paints quite a bit, to a consistency thinner than cream, but thicker than milk. That way I can use pretty low pressures, around 15-17 psi, which gives me a lot more precision than with thicker paint and higher pressures. I use an Iwata Eclipse HP-CS airbrush, with a 0.35 needle, giving me the precision I want at low pressures, but with a decent coverage when needed. More thin coats are always better than one thick. It should take but seconds for the paint to dry to the touch. As for brand of paint, I use primarily Createx and Hobbynox, because they are easily available to me. I haven’t noticed much difference between them.
With that said, let’s start. A couple of very thin coats of transparent red and blue on the shirt and trousers respectively. I used a medium blue mixed with a bit of white and black to desaturate it a bit. A few minutes drying time between each coat. As you can see, I slipped a bit with the blue, but no worries. Plenty of time to fix that later.
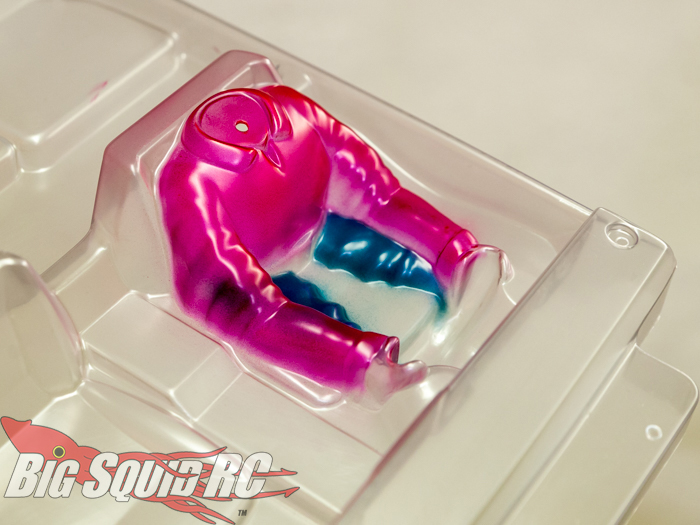
With the basic colors blocked in, I backed the raised areas (that is, the recessed areas when looking from underneath) with white, to create highlights. That’s a great thing with transparent colors, there’s plenty of opportunity to create tints and shades with different backings. Please excuse the mind bending photograph.
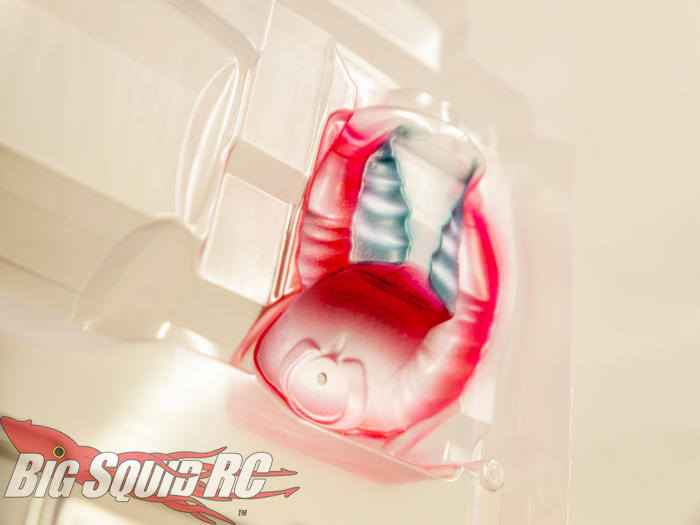
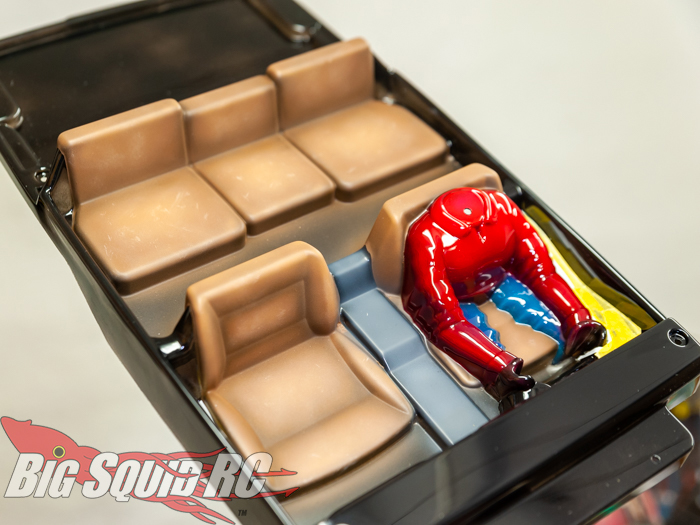
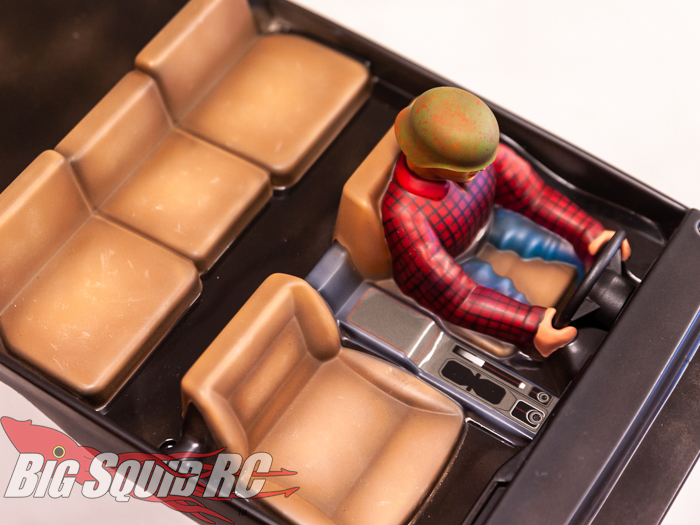
I then continued by layering opaque red and blue on top of it all, before I backed everything with black. In the picture below you can see how the use of white backing created areas of light and shade on his arms, chest and trousers. Also, in the picture below you can see the start of the next step: cutting and peeling away the overspray film to expose the seats. Once exposed, I sprayed everything from the top with Tamiya matte varnish. Rattle can, I do use them.
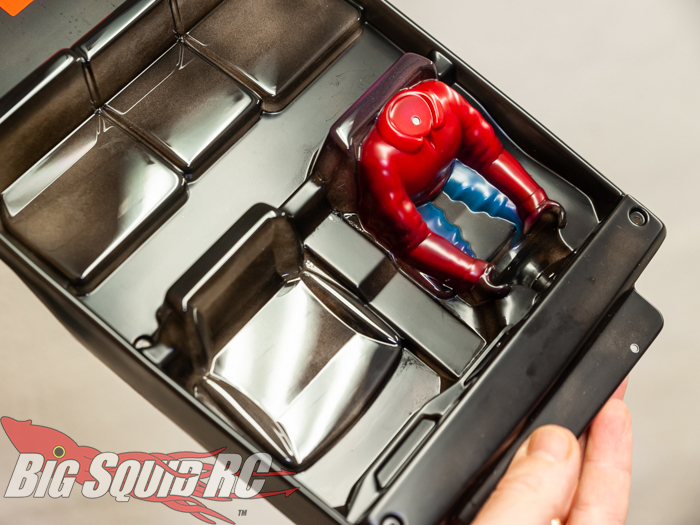
This matte varnish adheres well to lexan, and can then be used as a base for acrylic colors. Acrylics do not attach to lexan, but they do work over a layer of polycarbonate paint, or varnish. The good thing with acrylics is that there’s an immense amount of colors to chose from, they are cheaper than paints for polycarbonate and they are very well suited for detail work. Always one to try new things, I have paints of several different brands: Vallejo, Citadel, AK color, Army painter. For the seats I started with a dark brown, as seen below. It’s not a perfectly even coat, but that will only add a bit more life in the end. Also, I left the recesses not black, but quite dark. That’s what several thin layers can do.
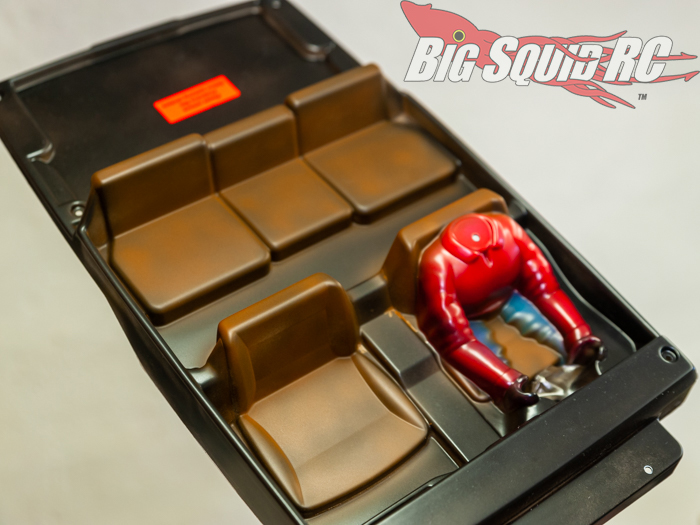
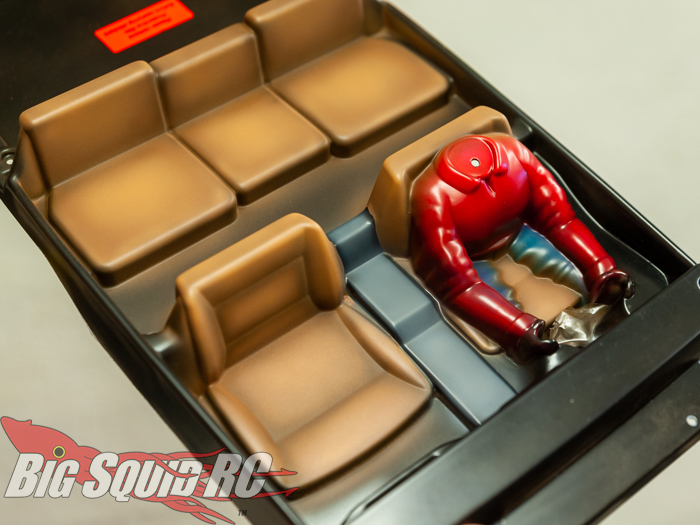
Then a medium brown followed, this time completely avoiding recesses to emphasise depth. Again, a couple of thin coats did the trick.
Finally, a light brown was used, this time focusing on edges and the middle of the seats. Areas that would see either light, or a bit of wear and tear.
I then continued by peeling the plastic from the console between the driver’s seat and the passenger seat, before spraying everything with Tamiya matte varnish again. I could then paint the console in a mid grey.
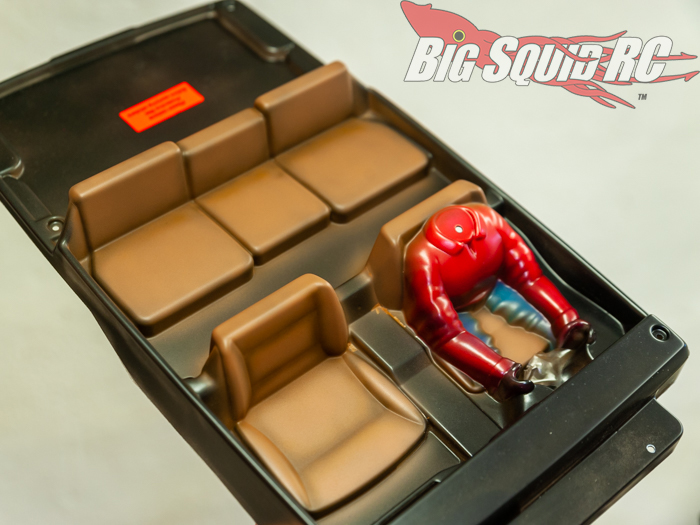
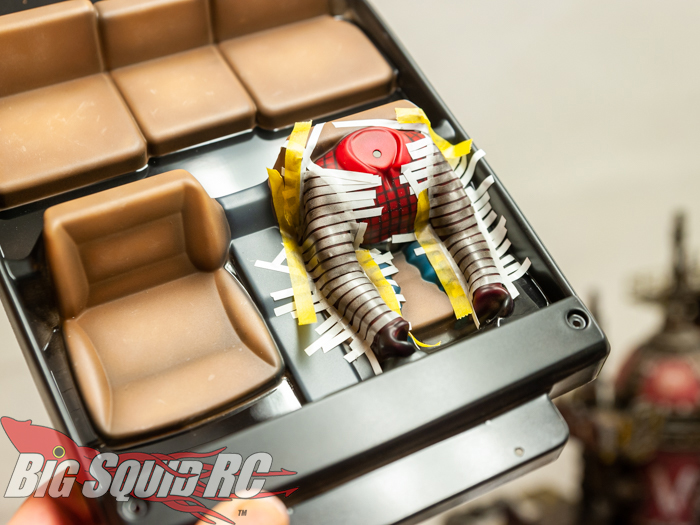
I peeled the plastic from the driver, thus removing brown overpaint, and sprayed everything with matte varnish (again!). Finally, I removed the overspray film from the floors, leaving them a gloss black that gives an illusion of depth. At this point, the interior could have been finished (except for the hands, that’s brush work later). However, did I have the sense to leave it a job well done? Of course not. Did I stick to my ambition of not using any masking tape. On the contrary.
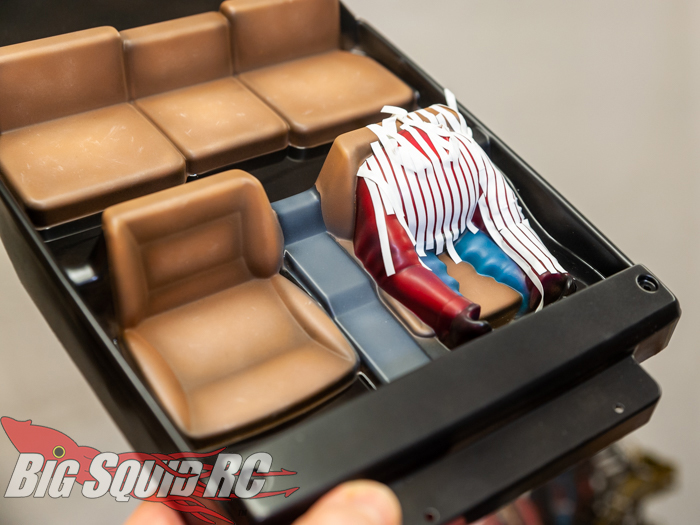
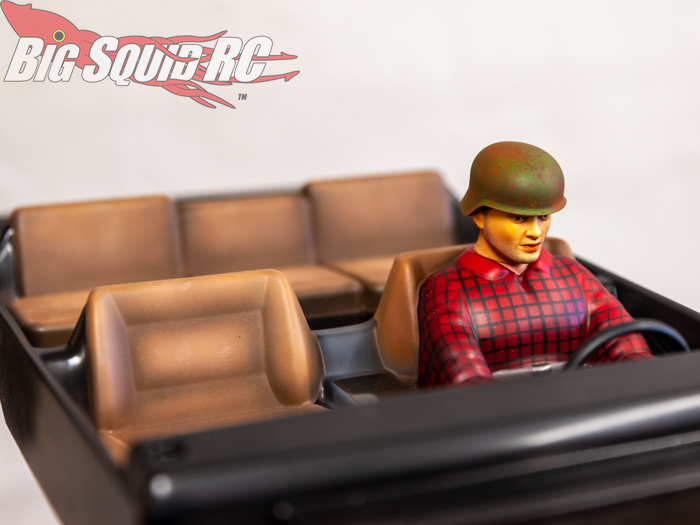
I had an itch in the back of my head that I had mentioned checkered shirt in my last column. There was no option but to go for it. After all, I write for BigSquid. It’s a privilege that comes with some freebies (thanks RC4WD, amainhobbies, club5racing and SamixRC!), but it also comes with a responsibility to keep pushing my skills and try new things. Checkered it was.
It took a lot of masking tape, first in one direction, then the other. First the body, then the arms. Mask, paint, peel, mask, paint peel. Repeat, repeat. While I was at it, I also gave the seats a rough dry brush with a very light brown, to create some wear and tear.

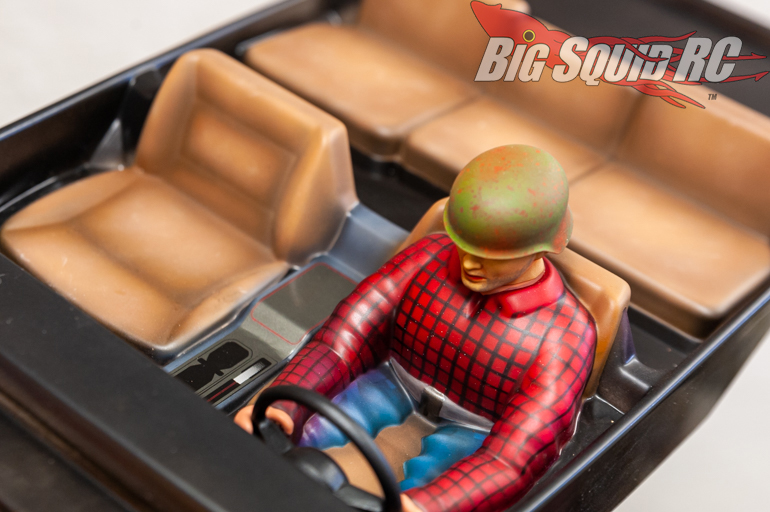
Then stickers, hands, face and a rusty ole helmet. Done!
Let me know your thoughts: martin at bigsquidrc.com Or hit the link to read another column!