Losing Grip – Hobbynox airbrush paints
I painted my very first polycarbonate body in 1992, using two pots of paint and a brush. A Kyosho Ferrari F40, state of the art. Red body, red spoiler, black windows. Back then precut window masks weren’t invented, so the method was slightly different. First, a thin (1mm) black masking tape was applied on the outside, marking windows and body lines. Then paint was applied by brush on the insidee, using the tape as a guide, carefully staying on the right side of the thin black line. I was a devout miniature painter, so had not much of a problem with this little challenge, and was very happy with the end result.
The five or six bodies following that one, twenty five years later, were painted using Tamiya spray paints and Bittydesign liquid mask, in ever more complex patterns. Rattle cans are a cheap and easy way of painting, and coupled with liquid mask, quite complex paint jobs are achievable. The only problem I find with them, is that the tiny droplets tend to be a bit uneven in size and distribution, so it is difficult to lay on a thin, yet even layer. This problem can be mitigated somewhat by putting the cans in warm water (read the warning text before doing this! Careful!) before using them, thereby increasing the pressure, and in turn getting slightly smaller particles. However, for colors that have a natural weak pigment, like red and yellow, I still find that I need three layers for an even coat.

For a paint job with only two or three different colors, this isn’t a problem. My Yeti has sixteen layers of paint, that was a problem. As the paint builds up, it becomes more difficult to peel the liquid mask. When I came to the last half a dozen layers or so, I actually had to cut through the paint to be able to peel off the underlying mask.

I have since bought an airbrush, no more rattle cans for me. The airbrush is an Iwata Eclipse HP-CS with a .35 needle, for medium to detail work, not ideally suited for painting lexan bodies. Paints for polycarbonate are quite a bit thicker than the acryl paints I use for miniatures, so I was very curious to see how it would cope with Hobbynox airbrush colors. Well enough, it turned out.
Now, mind that I am used to airbrushing using Vallejo acrylic colors, high quality acrylic paints made for plastic models. That’s what I am comparing Hobbynox airbrush paints to, and that is some very tough, actually totally unfair, competition.
I tried to get hold of Pro-Line colors, but since that proved to be difficult where I live, I turned to Hobbynox. They have a pretty extensive range, at a decent price, so the main problem was knowing exactly which blue I should get. Change blue, Iridescent blue, Neon blue, Solid blue, Pearl blue or transparent blue? The hue is pretty similar for all these different options, but according to their respective descriptions they differ quite a bit in the final paint effect.
The Change colors are supposed to “add shimmering metallic highlights as you view it from different angles. […] If backed with solid black you will get a solid metallic color with the highlights as you view it from different angles.” The Pearl colors are “vibrant paints made by combining pearlescent pigments of various types.” Compared to metallic paint they are “not limited to sparcle with silver alone and the paint effect looks a little deeper”. Meanwhile, the Iridescent colors are “Pearl paints with an added hue shift that changes its appearence mostly on contours and edges of the painted item.”
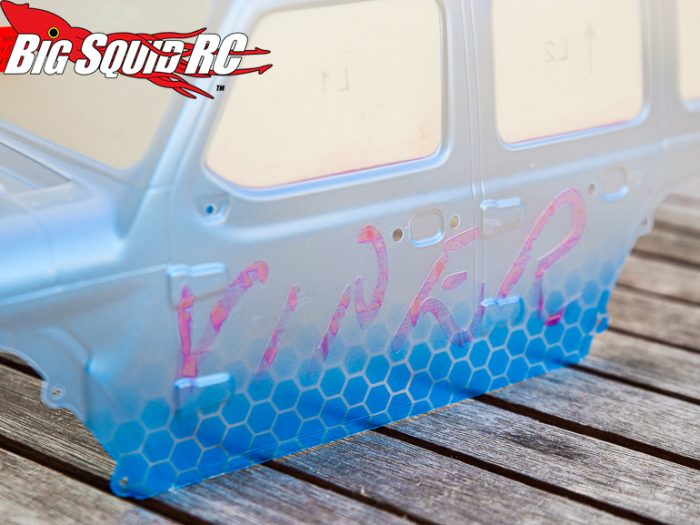
So many options, but only one body to paint. To begin with. After some deliberation, I decided on the Change and Iridescent blues. I tried them both on a spare piece of lexan, with a couple of different backings, before I decided to use Change blue backed with black as the main color, with a discrete accent in a hexagonal pattern of Change blue backed first with Iridescent blue and then with black. In the picture below, only the black backing remains, except of course the lettering. It’s hard to believe that the body will end up blue, when it looks transparent to start, but it does.
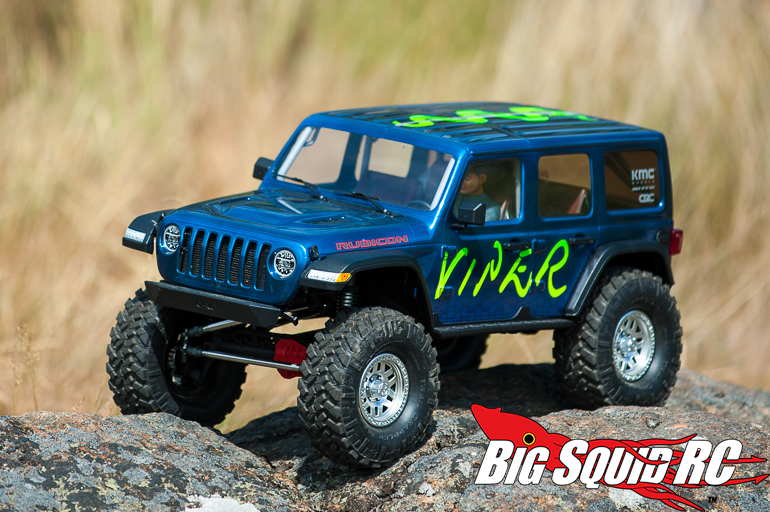
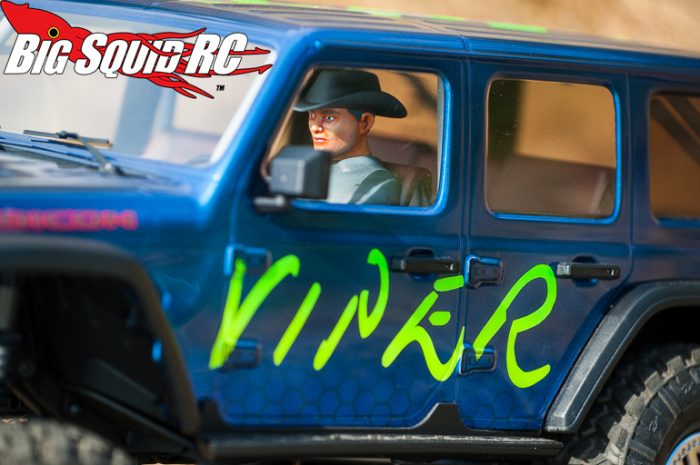
And here is the final result, the hexagonal pattern being discrete, essentially just adding a little bit of life, but not demanding any attention from the viewer. Just the way I want it.
When painting, I diluted the paints with Hobbynox Reducer to a ratio of roughly 3-4:1. This worked fine as a starting point, using a pressure of 15-23 psi. More when covering large surfaces, less for finer work. For the more detailed work, I diluted a paint a bit more. While the paint was quick to clog the needle as soon as I interrupted the air flow, I am still very happy with the paints. Sure, I couldn’t do as fine lines as I can with Vallejo colors, but that certainly cannot be expected either. The main problem with my thin needle was that it was a bit time consuming to paint large areas. Not a big deal when painting black since that’s a very visible color, but with the Change blue it was a bit of a problem. When first painted, that color is hardly visible at all, so it was rather difficult to get an even layer. Then, when it is backed by black, magic happens and a deep blue metallic color is the result. The blue shifts when viewed from different angles, hints of purple and green giving life to it.
If I were to get an airbrush specifically for RC bodies, I would buy one with a 0.5 needle, like a Badger Patriot, but for now I am happy to continue with my Iwata Eclipse. For liquid mask (from Bittydesign, not Vallejo!), Bittydesign recommends a 1.4 or 1.7 needle, but with that I won’t bother since I find it quite easy to simply brush this on.
While I haven’t tried it properly, I am guessing that Vallejo colors could be used on top of a layer of Hobbynox Intercoat-Clear, and then sealed with the same, on small areas of detail work. Especially on craslers and drifters, bodies that don’t get heavily abused. I will try this eventually, it’s on my RC to-do list, I’ll let you know when I have some results to share.
Bottom line is that I won’t buy any more rattle cans. From now on, it will be airbrush. Out of pure brand loyalty, I would have gotten Pro-Line paints if I could, but am very happy with the Hobbynox paints I have used. Lots of colors and effects to choose from, and easy to work with even with an airbrush not really suited to the job. Easy to dilute, easy to do color gradients, and possible to lay on very thin layers while still keeping them smooth and even.
To read another column, hit the link.