Losing grip – Painting faces
Today: heads. Because heads are important, not only to people in general, but also to an RC interior. If you’re doing an interior, it’s worth spending a bit of extra time on your chosen driver’s head, because that’s what our eyes are naturally drawn to. The very first thing anyone will see, upon reflex, is your driver’s face. We all know that the first impression tends to last. If you’ve spent ages on your interior, you need a face to match it.
Last time I painted a driver’s head, I used brush and acrylic colors, as seen in this column. Have a look below for the result.
Pretty good, took an evening to do. This time I wanted to try something different, namely my airbrush. I mean, I’ve got it, so why not use it? Also, it figured it would be a lot easier. I was right about that, so here goes: a recipe for getting a decent result quickly, with techniques that actually are quite easy. For reference, I’ll jot down the exact colors I used, but skin colors from any brand will do. Plenty to chose from.
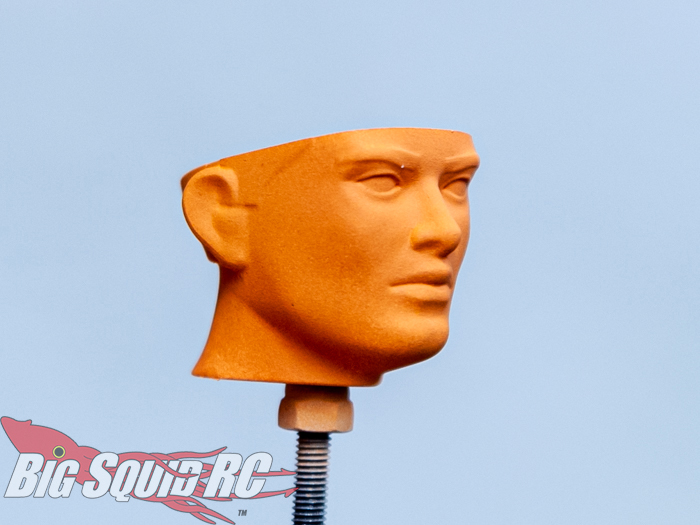
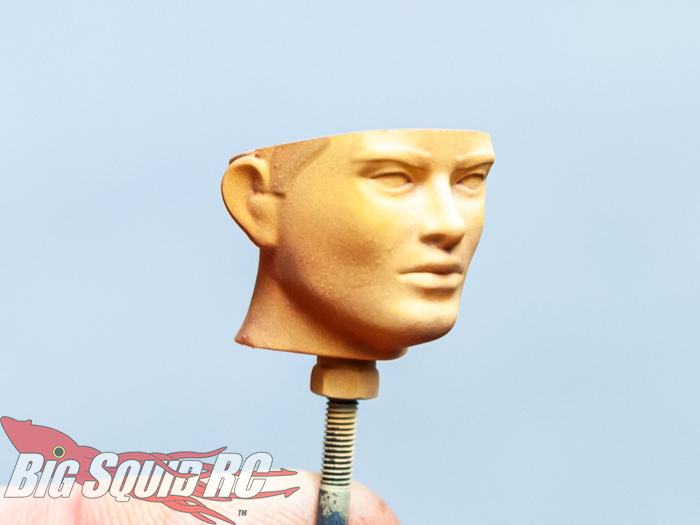
First, remove mould line with a sharpie, mount the head on a long M3 screw to keep your grubby fingers off it, and give it a white base coat using any kind of polycarbonate spray. With the base coat done, acrylics can then be used. I started out with an even coat of a dark skin tone (Vallejo german red brown mixed with AK medium flesh), before hitting it with a light coat of a medium skin tone (AK medium flesh) sprayed at around a sixty degree angle from above. This provided basic shades and highlights.
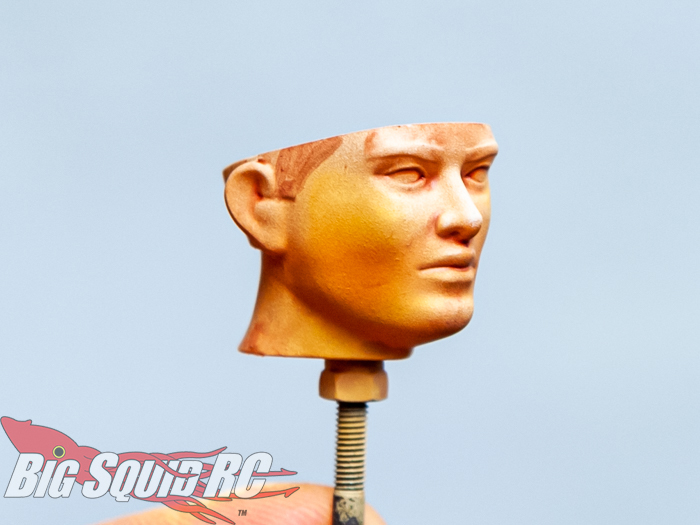
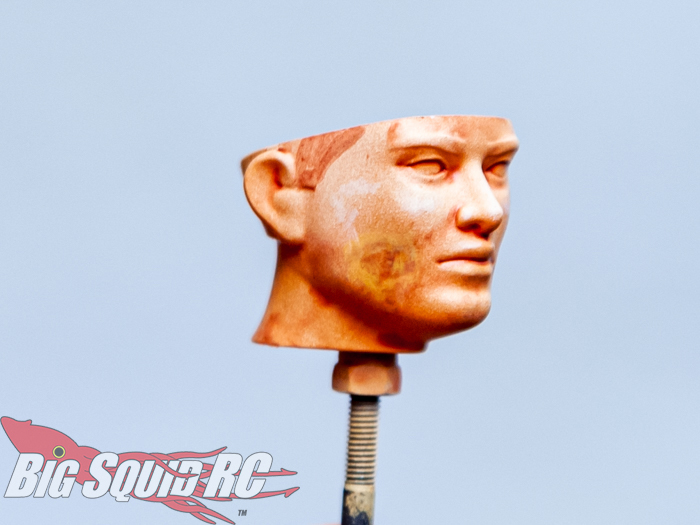
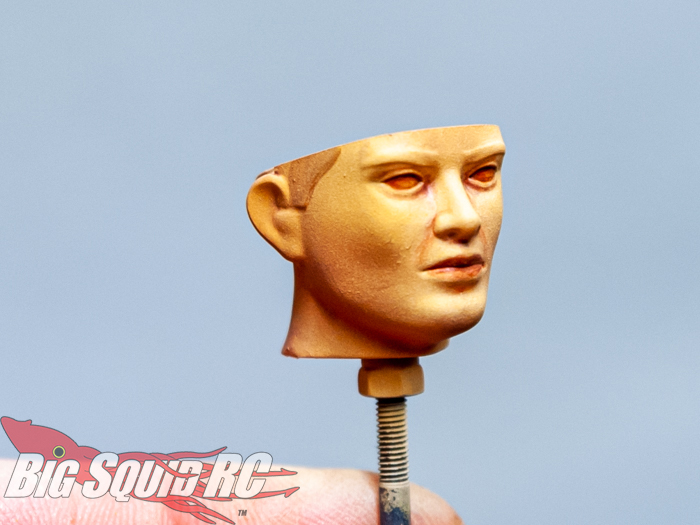
I then strayed from the plan and gave the face a wash with Citadel color Bugman’s Glow, a thinned down dark skin tone designed to flow into the recesses. Don’t do this. It totally messed everything up, the poor dude looks lika a bad case of a nasty skin disease. I tried to save it using a brush, but as you can see below that didn’t work out. Not pretty.
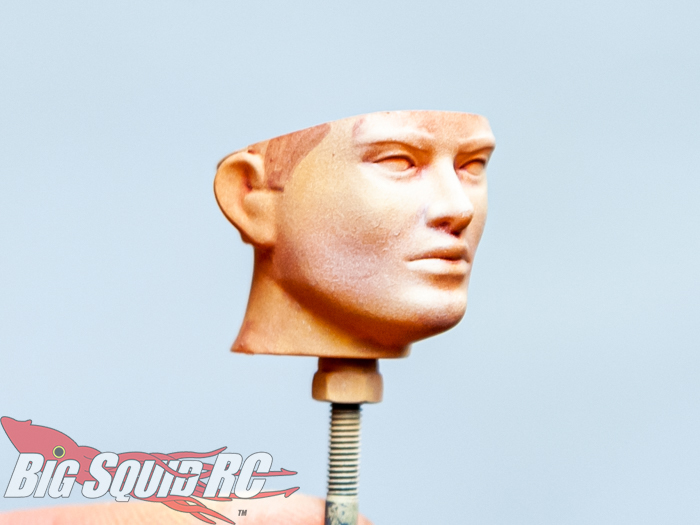
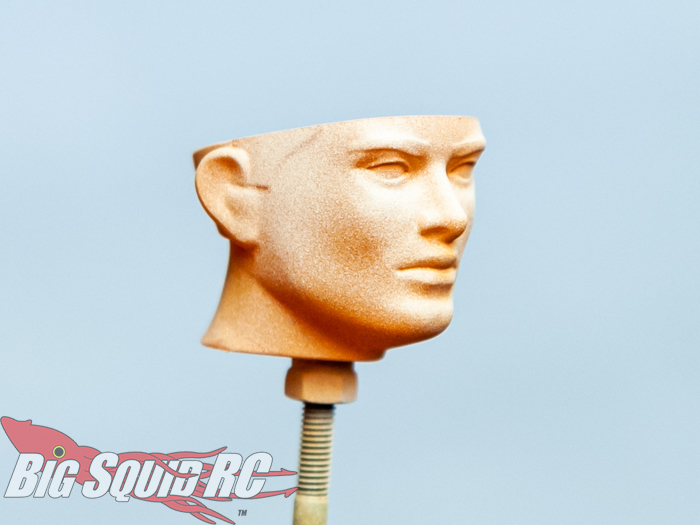
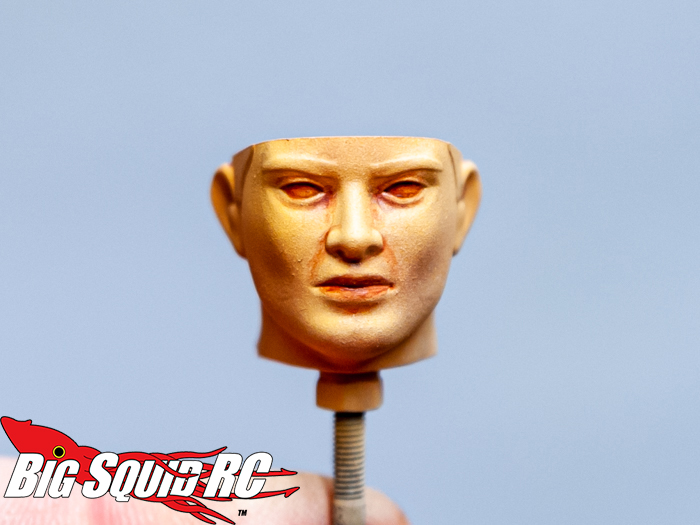
 No real need to mention this, apart from letting you know that I mess up from time to time, and that mistakes can be dealt with. I redid the whole thing from step two and then added a thin coat of a very bright skin tone (AK luminous flesh) sprayed almost directly from above. This created the final highlights on nose, chin and cheeks. At this point, after four layers of paint (polycarbonate base coat, dark skin tone, two successive highlights), you could stop and be happy. There’s a bit of definition, and whatever head dress you decide upon, it will hide the unpainted eyes when viewed from only slightly above.
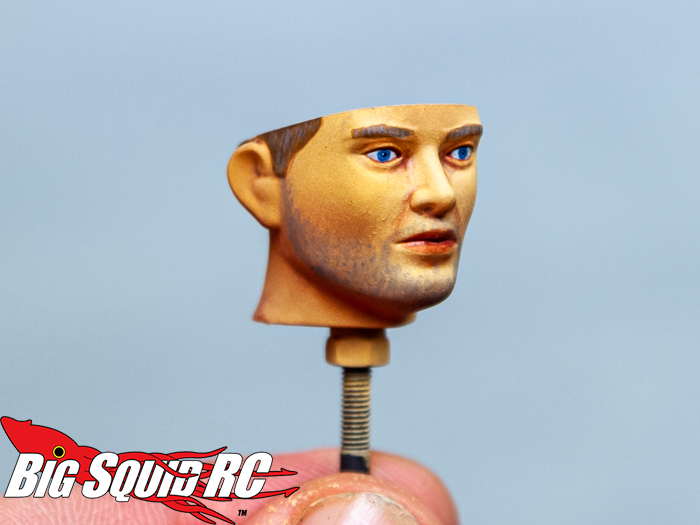
I pushed on, of course. Using a fine brush , I then carefully painted a wash into the recesses around the nose, upper lip and eyes, to give the face a bit more definition. At this point I also gave the lips some definition, as well as some medium brown hair.
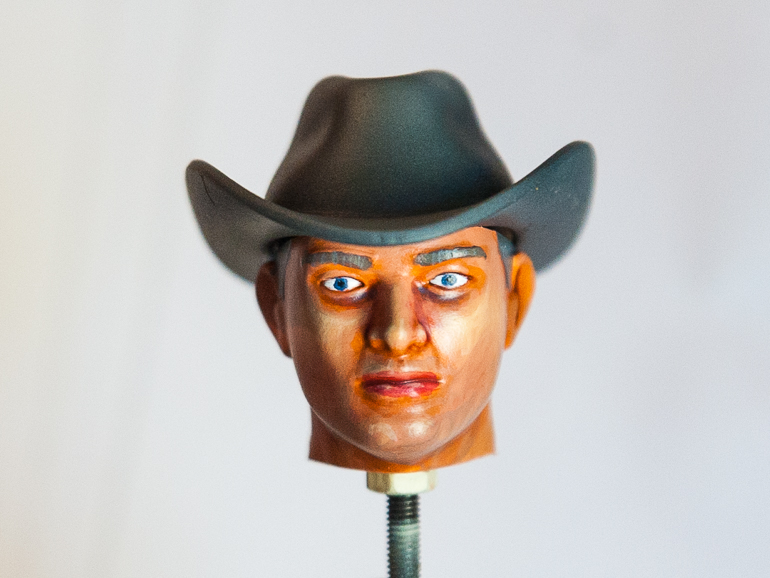
Finally, details, again with brush. Eyebrows, eyes (including a light reflex in the pupil), and a five o’clock shadow. Done! Tadaa! The lower lip looks a bit weird in the photograph, better in real life.
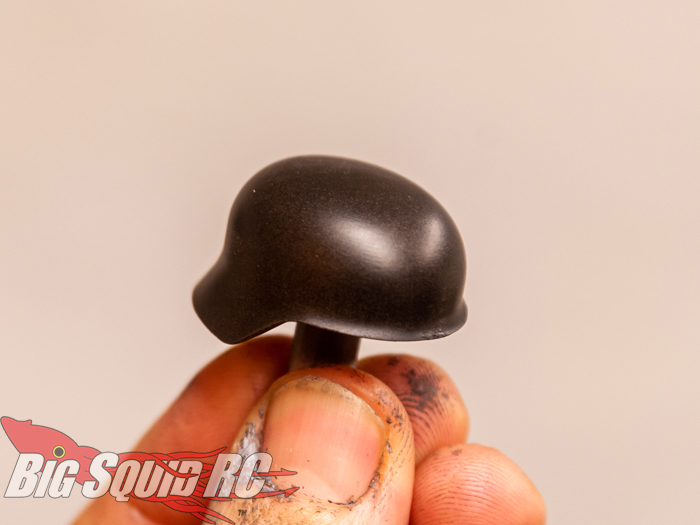
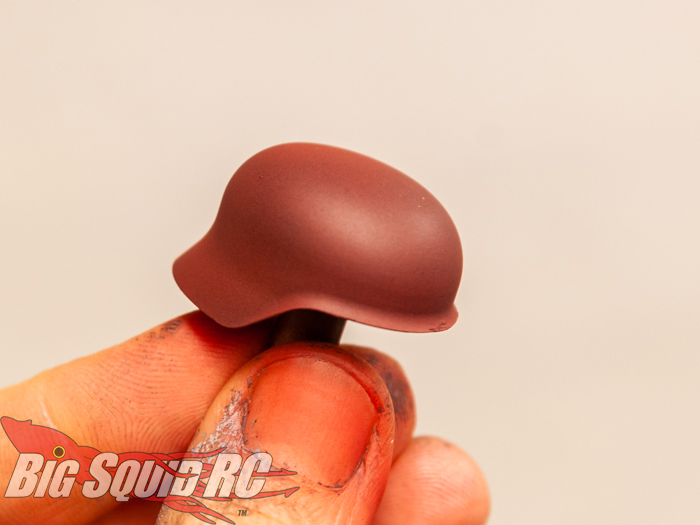
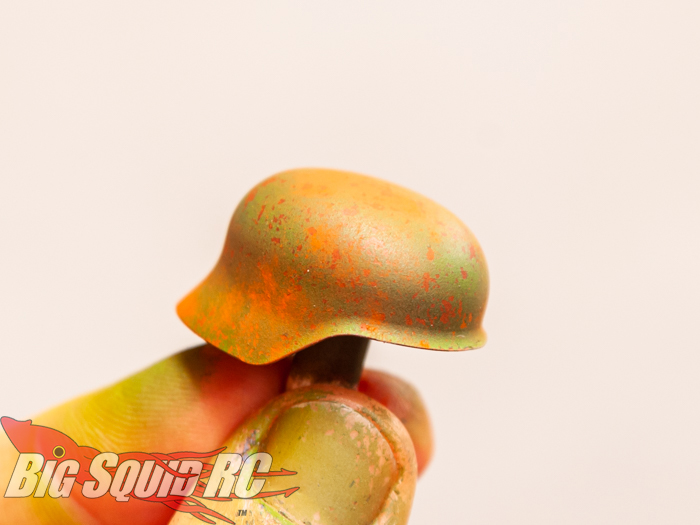
Then to chose something to wear. Cowboy hat, cap or army helmet? Easy! How to not use a rusty ole’ helmet when Axial provides one. Again, using an airbrush it is very easy to get a really good result. First, black base coat with polycarbonate paint. For reasons that soon will be obvious, I then started by painting my would-be green helmet in Vallejo german red brown.
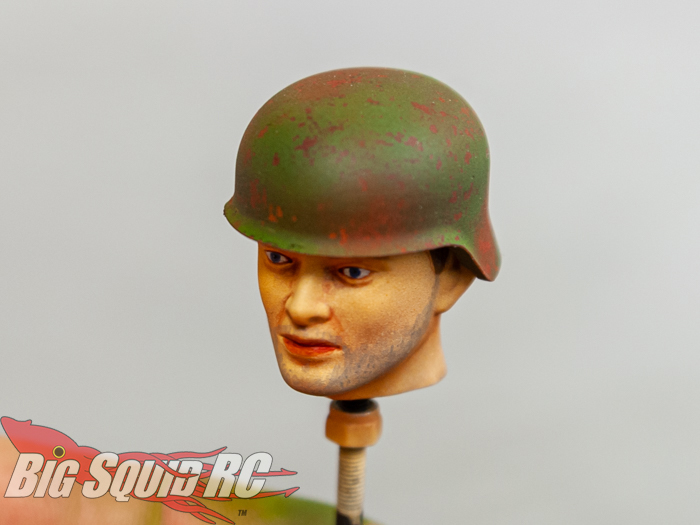
Next, I gave it some random patches of AK medium rust and AK light rust. This could be skipped, but will give it just a little bit more life in the end.

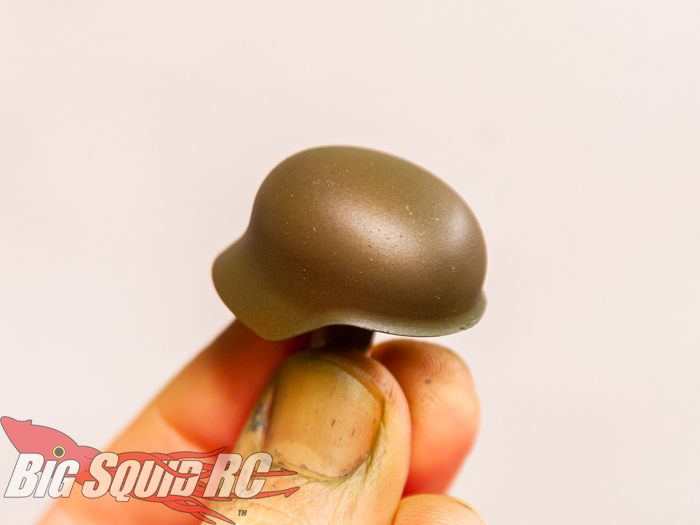
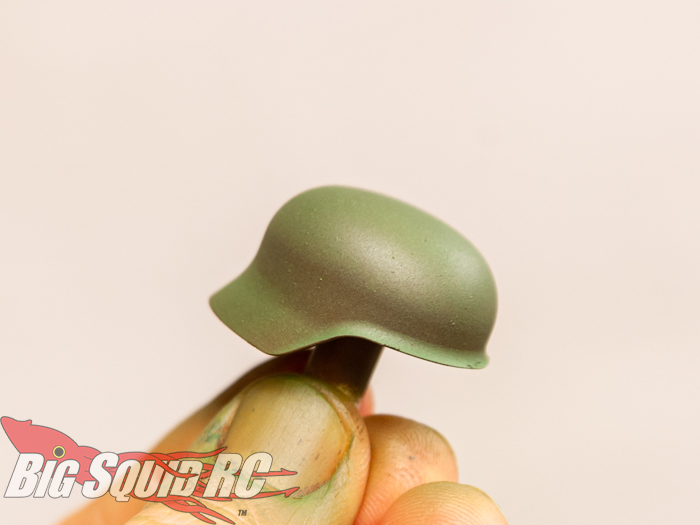
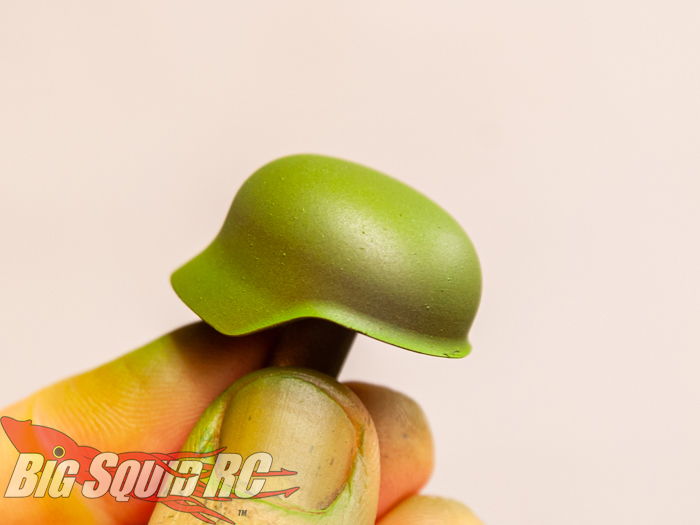
Before the next step it is important that the paint is absolutely, fully dry. I left it for an hour or so before hitting it with magic: Vallejo Chipping Medium. At a pressure of around 17 psi (with a 0.35 airbrush, probably a bit less with a 0.5), this transparent medium spatters out as tiny, random droplets. This product, a water based solution, slows down the drying of the next, final color. I let it dry for a few minutes (it is dry when it looks dry), and then hit the helmet with three coats of successively lighter shades of olive green: Army Painters Militia green, Army green and Drab green, from a progressively steeper angle. Like with the face, this produced some natural shading. Very easy to do.
I then left it to dry for around twenty minutes. Don’t worry about leaving it to dry for too long, I’ve never had any problems doing that. I have gotten problems when moving on too quickly though. So, after roughly a cup of coffee, I hit the helmet with luke warm water and an old tooth brush. As I said, the chipping medium delays drying, so that when the color is worked with some water and a brush, it comes off in a random pattern to reveal the layer underneath. In this case orange, as in rust. Realistic wear and tear created in an instant. This could be done with rattle cans and hairspray (which has the same effect of delaying drying time as chipping medium does) as well. I have tried that, but since I got my airbrush, this is my preferred technique.
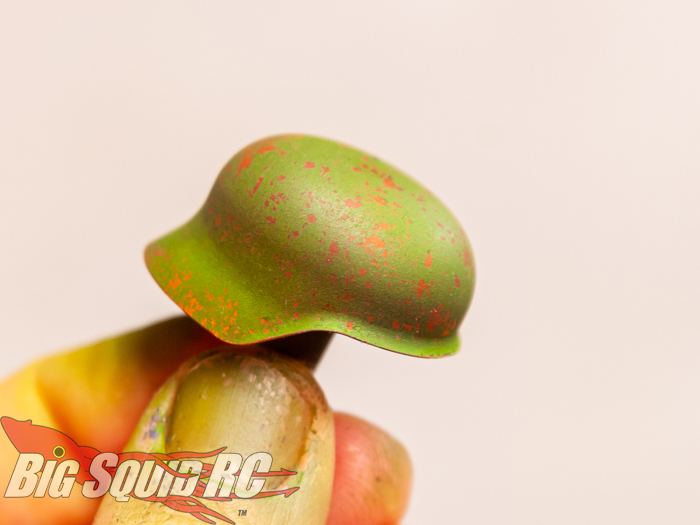
To finish it off, I applied some weathering powder (Vallejo medium red I think) using a brush, and manipulated it with the brush and my finger tips until I was happy. Finally, I applied some matte varnish to seal it all in.
Helmet on head, done! By the looks of it, he’s using his granddads old helmet, recently found in the attic.
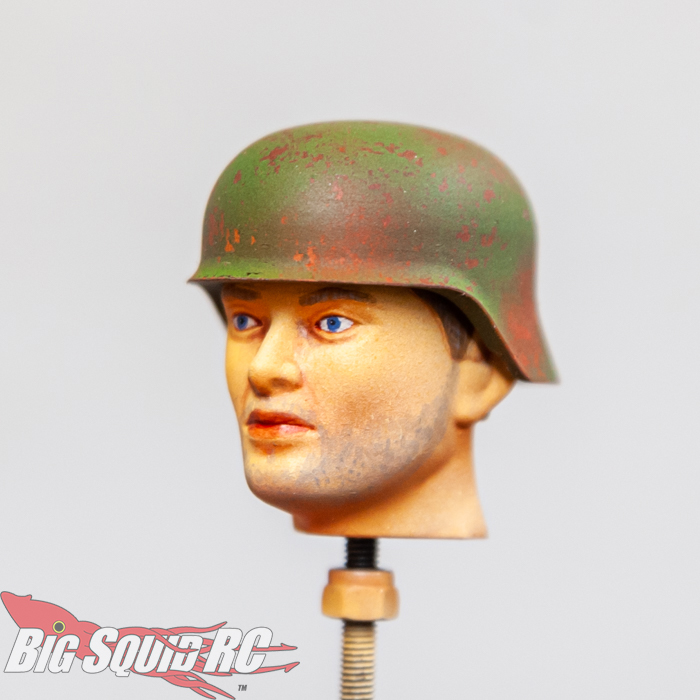
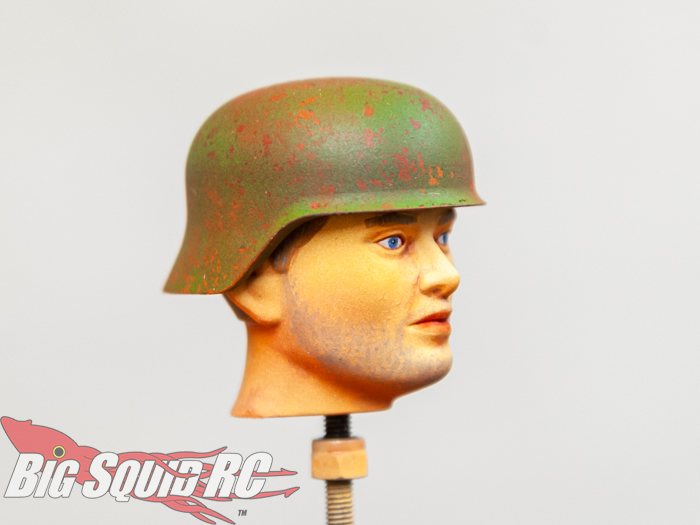
If you’ve never painted a scale head before, this might seem more than a mouthful. But do have a go! Worst case scenario: you mess up. Well then, redo it. I messed up, I redid it. No worries! It’s a toy after all, his skin condition was never real. And if it was, I’m proud that I cured him.
To read another column, hit the link!