Losing grip – Raising my bar
Last week I wrote about all the ways this hobby can challenge us, this week is about what’s my chosen challenge for the moment. Giving my SCX10 III a new look, better than the previous one. New wheels from Locked Up RC, and a yellow paint job for more striking visibilty in photographs.
I’m going with the same body as before, the original Jeep Wrangler Rubicon. It’s a really good looking one, and it’s pre-cut. I quite dislike cutting polycarbonate bodies, so to me that’s a big bonus.
Everytime I paint a new body I try to improve, and maybe try out something I haven’t done before. My last one was the first body I re-painted, the one before that was the first time I used airbrush. I won’t ever go back to rattle can again, to sum that one up.
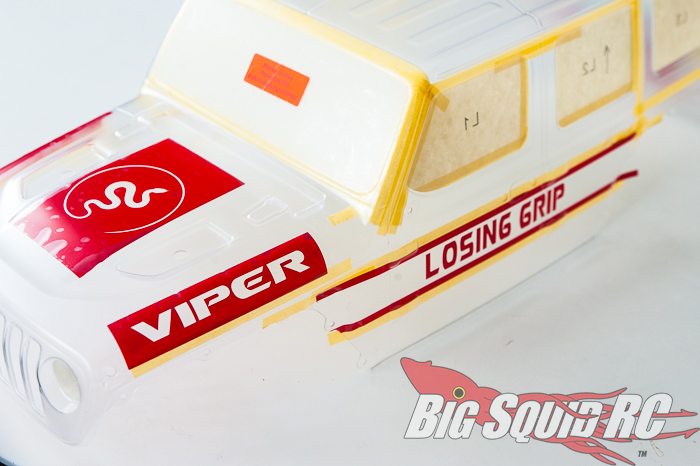
For this one, I wanted sharper graphics, and trying out body lines. If the color scheme was to be simple – black and yellow – I felt a need to compensate with cleaner graphics, things that I haven’t been able to do before. Some of you might remember how I totally messed up a drift body about a year ago, using the wrong kind of liquid mask, and trying to cut something too complex. Disaster, I had to throw the whole thing away. Except for a tiny bit of it, that I cut off and used to mend a broken fender on my daughter’s bike. Using polycarbonate RC bodies to mend bicycle fenders works fine, but is a bit expensive. Can’t recommend it.
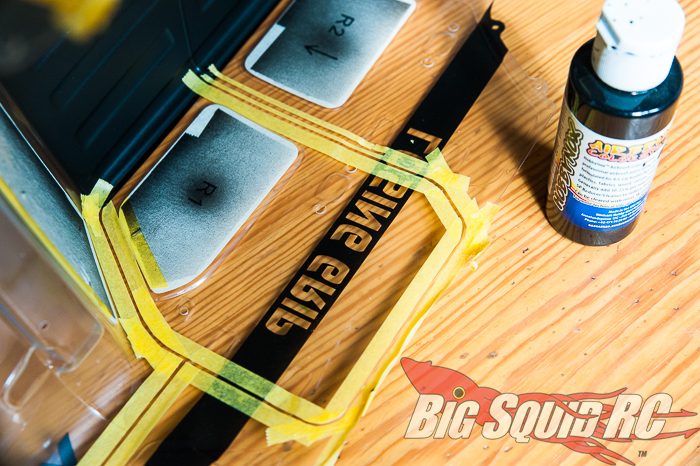
What I can recommend is a vinyl cutter. With the aid of a Cricut Joy, I was able to do better, cleaner, sharper and more intricate graphics than ever before, and a lot faster as well. I mean, really a lot faster. The design program was a joy to use, way easier than trying to create the same designs in Word or Photoshop. I did some googling to find the right font, then it was a breeze to import it into the program, write the texts, and adjust measurments and alignement to where it all lined up the way I intended. Pictures of snake was found on shutterstock, and downloaded for free using their introduction deal. Then send it all to machine, get it cut, remove excess material, add transfer tape on top, apply to inside of body. Then just to add some masking tape around the designs, hit with the airbrush, remove the vinyl. Done!
I might have been able to cut the snake designs on the roof and bonnet in liquid mask, but I wouldn’t ever have gotten the circles perfect. And the letters on the side? No way I could cut that. Not anywhere nere the perfection of a vinyl cutter.
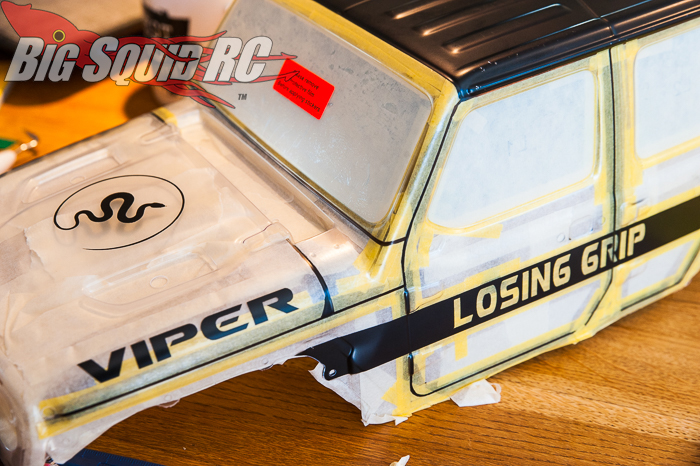
I also gave panel lines a shot, one that didn’t turn out quite as perfect as the vinyl cutting. I used Teppei Makimoto’s method of masking the lines on the inside.
The first lines I then painted using a brush, like he does, before masking everything else off and switching to airbrush due to fear of paint bleeding under the masking tape. It turned out reasonably well, at least when viewed from a little distance. It might have been better to paint them on the outside, using a pen. I might try that next time. Yet another little challenge to pursue…
Next week, I hope to be able to show it off, all new and shiny. The week after that, it’ll have scratches. The first cut is the deepest, then I’ll get used to it.
To read another column, hit the link!